
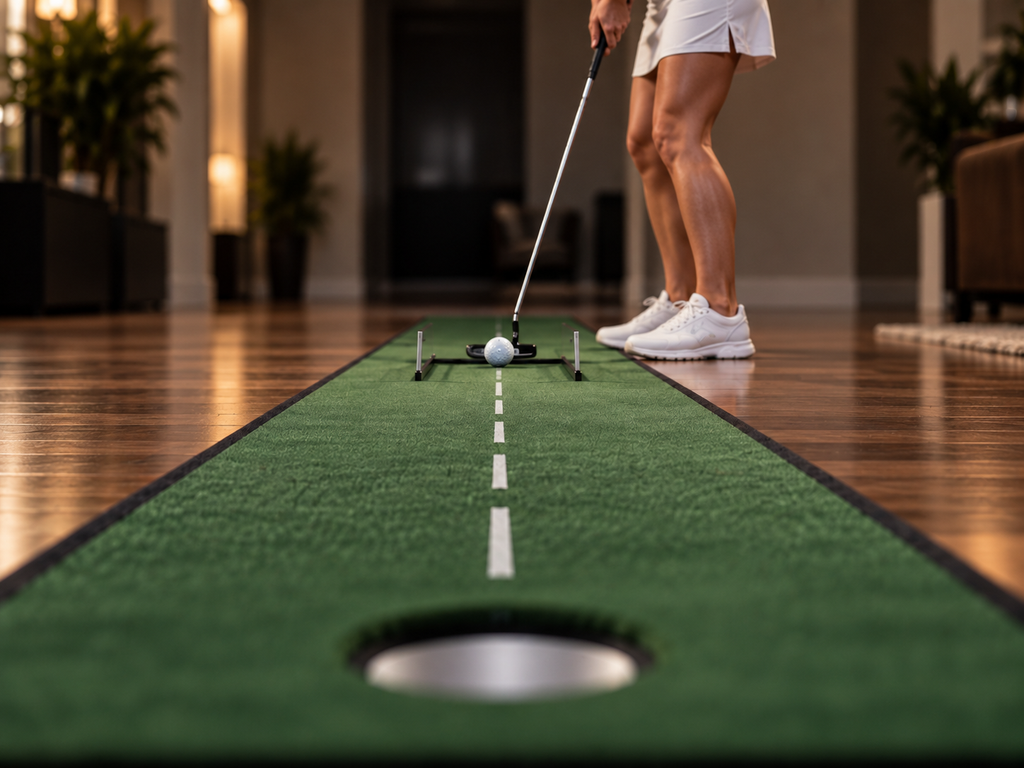
Practicing putting at home can be one of the easiest ways to build a more reliable stroke without needing to visit a golf course or practice green.
A simple putting mat gives you a consistent surface where you can work on starting the ball on your intended line, controlling the movement of the putter and becoming more confident over short putts. Adding a few basic putting aids can make those practice sessions even more useful by giving you immediate feedback when something changes.
You do not need a complicated indoor training system. A relatively flat putting surface, a putter, several golf balls and one or two simple training aids are enough to create an effective home practice setup.
Why Use a Putting Mat?
Putting mats give you a predictable environment where you can repeat the same type of putt many times.
On a real green, changes in slope, grass length, moisture and surface condition affect how the ball rolls. Those variables are part of golf, but they can make it harder to isolate one specific part of your putting technique.
At home, the consistent surface of a putting mat allows you to concentrate primarily on your stroke and starting direction.
This makes putting mats particularly useful for practicing:
- Starting the ball on your intended line
- Controlling the path of the putter
- Developing a repeatable stroke length
- Improving short-putt consistency
- Building confidence from common practice distances
- Creating a regular putting routine
The goal is not to perfectly reproduce every condition you will experience on a golf course. Instead, the goal is to create a controlled environment where you can repeat good putting movements.
Choosing a Simple Putting Mat
Putting mats range from small strips of artificial turf to larger practice systems with multiple targets, alignment markings and different slopes.
For basic home practice, simplicity is usually enough.
Look for a mat that lies flat and allows the ball to roll smoothly without obvious bumps or wrinkles. A straight target line or alignment marking can also be useful because it gives you a clear visual reference.
The mat should be long enough to practice short putts comfortably.
A practice area of approximately three to six feet allows you to work on many of the putts that are most useful for indoor repetition.
Extremely long indoor mats are not necessary if your main goal is developing starting direction and short-putt consistency.
Create a Consistent Practice Area
Where you place the mat matters.
Try to find a relatively level section of floor where the mat can remain flat. Hard flooring underneath the mat often provides a more consistent base than thick carpet.
Before practicing, make sure the mat is not curled or uneven.
Small changes in the surface can alter the roll of the ball and make it difficult to determine whether a missed putt came from your stroke or the practice surface.
If possible, leave the mat in the same location.
Using the same practice environment helps make your sessions more repeatable.
Start With Short Putts
Short putts are ideal for home practice because you do not need much space and the result is easy to evaluate.
Begin approximately two or three feet from your target.
Your objective is simple: start the ball on the intended line.
At this distance, you do not need to generate much speed. That allows you to focus more closely on the movement of the putter and the direction the ball begins rolling.
Once you can repeatedly start the ball on line, gradually increase the distance.
Move back to four feet, then five feet if your practice area allows it.
Avoid constantly changing distances during every practice session. Repeating the same putt several times makes it easier to recognize patterns.
Practice Starting Direction
One of the most useful things you can practice on a putting mat is starting direction.
The first few inches of the ball’s roll reveal whether the putter sent the ball along the intended line.
Many putting mats include printed alignment lines. If yours does not, you can create a simple reference using removable tape, a ruler or another straight object placed beside the intended line.
Place the ball directly on the line and choose a target.
Make your stroke and watch where the ball begins rolling.
If the ball immediately moves left or right of the line, something changed at impact.
Do not immediately make a major mechanical adjustment. First determine whether the miss is consistent.
A single poor stroke does not tell you very much. A repeated pattern does.
Use a Gate for Starting-Line Practice
A putting gate is one of the simplest training aids for checking starting direction.
You can purchase a putting gate or create one using two small objects such as coins.
Place the objects slightly wider than the golf ball approximately six to twelve inches in front of the ball.
Your goal is to roll the ball through the gate without touching either side.
Start with a relatively wide gate.
As your control improves, gradually move the objects closer together.
The gate gives you immediate feedback. If the ball hits the left side, it started too far left. If it hits the right side, it started too far right.
This drill helps you focus on the initial direction of the putt rather than only whether the ball eventually reaches the target.
Use Alignment Aids Carefully
Many putting mats and training devices include alignment lines.
These can help you position the ball, putter and target consistently.
One useful method is to draw or use the existing alignment line on the golf ball and point it directly toward your target.
Then position the putter behind the ball so the putter face appears square to that line.
This creates a clear visual relationship between the ball, putter and intended starting direction.
Alignment aids should help simplify your setup.
If you find yourself staring at several lines and making constant adjustments, reduce the number of references you are using.
One clear target line is usually enough.
Practice Stroke Control
Putting mats are also useful for developing better control over the length and rhythm of your stroke.
Choose one target distance and hit several putts from the same location.
Try to make each stroke with a similar length and tempo.
Do not try to guide the ball toward the target with your hands.
Instead, allow the putter to move smoothly through the ball.
Pay attention to whether your backswing and follow-through remain reasonably consistent from one repetition to another.
You are trying to create a stroke that feels predictable.
Repeated practice on the same surface makes changes in your stroke easier to notice.
Create Distance Markers
Even on a relatively short putting mat, distance markers can make practice more organized.
Mark common practice distances such as:
- Two feet
- Three feet
- Four feet
- Five feet
You can use printed markings on the mat or small pieces of removable tape beside the mat.
Practice several putts from one distance before moving to the next.
This gives you a simple progression and prevents you from hitting random putts without a clear objective.
Use a Putting Mirror
A putting mirror can help you check your setup while practicing indoors.
Most putting mirrors are placed underneath the ball and include alignment markings.
They can help you check whether your eyes, shoulders and putter are positioned consistently before the stroke.
The main benefit of the mirror is feedback.
Without a mirror, your setup may gradually change without you noticing.
You do not need to make your setup look perfectly symmetrical. The purpose is to identify a position that feels comfortable and repeatable.
Once you find that position, use the mirror occasionally to confirm that you are returning to it.
Use a Putter-Path Gate
You can also create a simple gate for the putter itself.
Place two objects on the ground slightly wider than the putter head.
Position one object outside the toe of the putter and the other near the heel.
Make several practice strokes without touching either object.
The goal is not to force the putter to move perfectly straight.
Different golfers naturally move the putter on slightly different paths.
Instead, use the gate to encourage a controlled movement without excessive sideways motion.
Start with plenty of space around the putter head and gradually narrow the gate if your stroke becomes more consistent.
Try a Coin or Small Target Drill
Your practice target does not always need to be a hole.
Place a coin, small marker or flat object at the end of your intended line.
Putt toward the target and try to roll the ball directly over it.
A small target encourages precision.
It also removes the distraction of watching the ball fall into a cup.
Instead, you can concentrate on starting direction and how the ball approaches the target.
This works especially well for short putting drills.
Create a Short-Putt Challenge
Turning practice into a simple challenge can help you maintain concentration.
Choose a distance such as three feet.
Try to make five putts in a row.
If you complete five successfully, move slightly farther away.
You could progress through distances such as:
Two feet
Three feet
Four feet
Five feet
If you miss, restart the set or remain at the same distance.
The exact scoring system is not important.
The benefit comes from adding a small amount of pressure to an otherwise repetitive practice session.
Making several putts consecutively requires more concentration than casually rolling balls toward the target.
Practice With One Ball Occasionally
Many golfers practice with several balls because it saves time.
That is useful for repetition, but it can also lead to rushed practice.
Occasionally practice using only one ball.
Hit the putt, retrieve the ball and begin again.
This forces you to reset before every attempt.
It more closely resembles what happens on the golf course, where you only get one attempt at each putt.
You can still use multiple balls when working on repetition. Simply mix in one-ball practice when you want to place more emphasis on concentration and routine.
Do Not Chase Perfect Results
Indoor putting practice is extremely repetitive, which can make it tempting to constantly adjust your technique.
Avoid changing something after every missed putt.
Instead, watch for patterns over several attempts.
For example, if one ball starts left but the next nine start correctly, you probably do not need to change anything.
If most of your putts consistently start left, then you have identified something worth investigating.
Home practice becomes much more useful when you evaluate trends rather than individual strokes.
Keep Sessions Short and Focused
You do not need to spend an hour practicing indoors.
Ten to fifteen minutes of focused putting practice can produce plenty of quality repetitions.
You might divide a short session into three areas:
Spend several minutes rolling balls through a starting-line gate.
Then practice controlling your stroke from one or two distances.
Finish with a short-putt challenge.
A simple structure keeps the session focused without turning practice into mindless repetition.
A Simple Home Putting Setup
You can create an effective putting practice area with only a few items:
A putting mat provides the rolling surface.
A putter and several golf balls allow you to repeat the same movements.
Coins or small markers can create starting-line gates and distance targets.
Removable tape can provide alignment references or distance markings.
A putting mirror or dedicated putting gate can provide additional feedback if you want more structure.
You do not need every training aid available.
Start with the simplest setup possible and add tools only when they provide useful feedback.
Focus on Feedback, Not Gadgets
Putting aids are most useful when they answer a specific question.
Did the ball start on the intended line?
Did the putter move through the gate?
Was the stroke controlled?
Did the ball reach the target consistently?
If a training aid gives you clear feedback about one of those areas, it can be valuable.
If an aid simply makes your practice setup more complicated without providing useful information, you probably do not need it.
The best putting aids are often the simplest ones.
Build a Repeatable Home Practice Routine
Consistency matters more than complicated practice.
A putting mat that remains available at home makes it easy to practice regularly.
Even a few minutes of focused repetition can help you become more comfortable starting the ball on your intended line and controlling short putts.
Choose a simple target.
Use a clear alignment reference.
Practice the same distance several times.
Add a gate or mirror when you need additional feedback.
Over time, your home putting setup should become a place where you can repeatedly test the same basic skills: starting direction, stroke control and short-putt consistency.
That is exactly what a good putting mat and a few simple putting aids are designed to help you practice.