
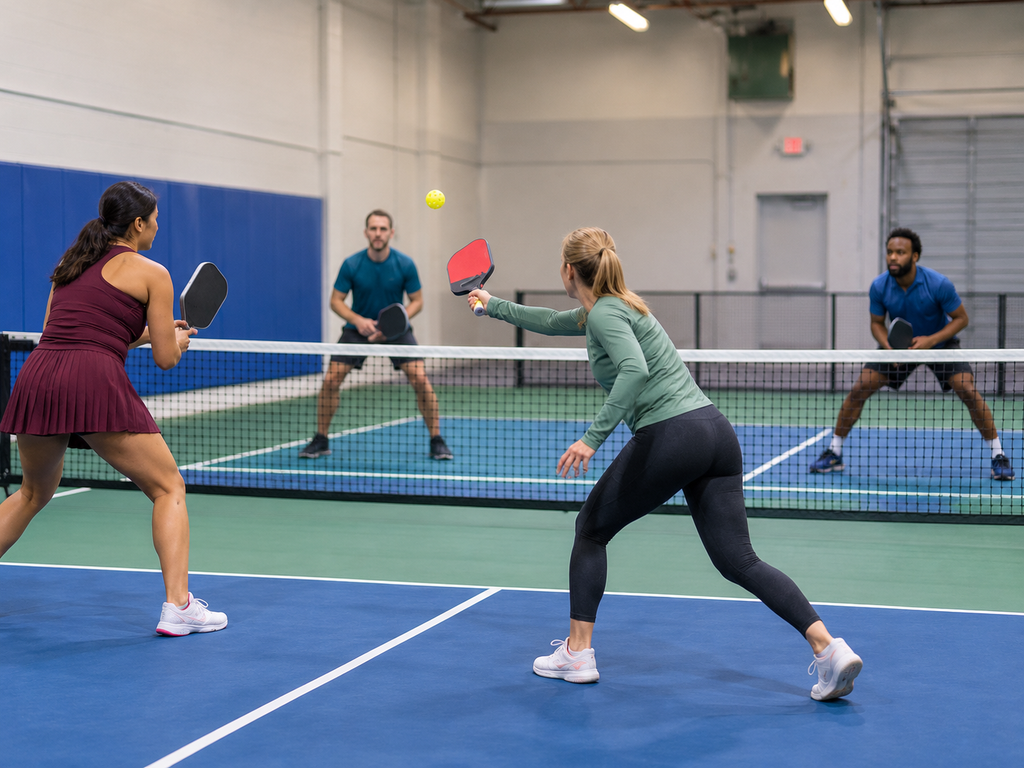
Moving from the baseline to the non-volley zone is one of the most demanding parts of competitive pickleball. While experienced players understand the importance of reaching the kitchen line, advancing too quickly or without sufficient control can expose them to aggressive volleys, difficult shots at their feet, and gaps in court coverage.
A successful pickleball transition zone strategy focuses on more than forward movement. It requires recognizing when to advance, establishing balance before opponents attack, selecting appropriate defensive shots, and coordinating movement with a doubles partner.
Advanced players understand that reaching the kitchen is not always accomplished in one movement. Sometimes, the strongest approach involves stopping, defending, and advancing through several controlled stages.
Learning to manage these transitions can help turn vulnerable defensive situations into balanced exchanges at the non-volley zone.
Understand the Role of the Transition Zone
The transition zone is the area between the baseline and the non-volley zone line.
Players sometimes refer to it as no man’s land because opponents positioned at the kitchen can direct shots toward players caught between the baseline and net.
However, the transition zone is not inherently a bad place to stand.
It becomes difficult when players are moving without balance, making contact from uncomfortable positions, or failing to anticipate the next shot.
Why Players Become Vulnerable
When you are positioned in the transition zone, opponents may have opportunities to:
- Direct fast volleys toward your feet.
- Hit controlled angles into areas that are difficult to cover.
- Force contact while you are moving forward.
- Apply repeated pressure before you establish a balanced position.
- Exploit gaps between doubles partners advancing at different times.
These challenges explain why many players struggle to reach the kitchen consistently.
The solution is not simply to run faster.
It is to understand when forward movement improves your position and when stopping to defend becomes necessary.
Recognize When to Advance
One of the most important advanced decisions involves determining whether your previous shot creates a suitable opportunity to move forward.
A well-executed third shot drop may encourage opponents to contact the next ball below net height, reducing their ability to attack aggressively.
A poorly executed drop that floats above net height may produce the opposite result.
Advance Behind a Quality Shot
Forward movement is generally more favorable when your shot:
- Descends below your opponents’ comfortable attacking height.
- Forces an opponent to move or reach.
- Limits the available attacking angles.
- Creates time for you to establish balance.
- Encourages a defensive or neutral response.
You do not need a perfect shot before moving forward.
However, the quality of the shot should influence how far you advance.
Avoid Advancing Automatically
A common mistake is rushing toward the kitchen immediately after hitting a third shot, regardless of where the ball travels.
If the ball sits high, opponents may have an opportunity to strike downward while you are still moving.
Instead, observe the outgoing shot and the opponent preparing to receive it.
If the situation suggests a strong attack, establish balance and prepare to defend.
Forward movement should be based on the developing rally, not a predetermined sprint.
Use the Split Step to Prepare for Contact
The split step is an important movement tool during transition.
It involves a small, controlled adjustment that helps establish balance and prepare for movement in different directions.
In pickleball, the timing matters more than the size of the step.
Time the Split Step Around Opponent Contact
As an opponent prepares to strike the ball, reduce your forward momentum and establish a ready position.
A small split step can help you react to the direction of the incoming shot.
The objective is to avoid being caught running forward when the opponent sends a fast ball toward your feet.
Maintain a Stable Athletic Position
During the split step:
- Keep your knees comfortably bent.
- Maintain your weight in a balanced, responsive position.
- Position the paddle in front of your body.
- Keep your upper body controlled rather than leaning excessively forward.
- Prepare to move laterally, forward, or backward according to the incoming ball.
Avoid exaggerated jumping movements.
A compact adjustment is generally more useful during fast exchanges.
Recover After Each Shot
Once you return the ball, reassess whether another forward movement is appropriate.
You may be able to advance immediately, or you may need to remain in position for another defensive exchange.
The key is to separate controlled movement from uncontrolled rushing.
Use Reset Shots to Neutralize Pressure
Reset shots play an important role in advanced transition-zone strategy.
When opponents direct fast volleys toward players advancing from the baseline, attempting to match their pace can increase the risk of an error.
A controlled reset provides another option.
The objective is to reduce the incoming pace and return a low ball into or near the opponent’s kitchen.
Recognize Reset Opportunities
Resets are particularly useful when:
- You contact the ball below net height.
- An opponent attacks toward your feet.
- You are defending from an uncomfortable position.
- A counterattack would require excessive risk.
- Your team needs to restore a neutral rally before advancing.
The best response depends on the incoming ball and your balance.
Not every difficult shot can be reset effectively.
Sometimes, a controlled block or another defensive return provides the strongest available option.
Keep the Paddle Movement Compact
Fast volleys allow limited preparation time.
Use a short, controlled paddle movement rather than a large backswing.
Regulate incoming pace and direct the ball toward a location that makes the next attack more difficult.
After contact, return the paddle to a ready position.
Opponents may continue attacking, so remain prepared for repeated defensive exchanges.
Advance Only After an Effective Reset
A soft shot does not automatically create a safe opportunity to move forward.
A reset that floats high may be attacked aggressively.
If your reset travels low and forces a difficult contact, consider advancing into a stronger position.
If the opponent remains capable of attacking, stay balanced and prepare to defend again.
Move Forward in Controlled Stages
A reliable pickleball transition zone strategy often involves advancing through several stages rather than attempting to reach the kitchen immediately.
This approach is especially useful against opponents who consistently apply pressure from the non-volley zone line.
Stage 1: Begin from the Baseline
After serving, remain behind the baseline until the return bounces, as required by the two-bounce rule.
Prepare to execute an appropriate third shot.
A drop may create an opportunity to advance, while a drive may produce a weaker response that can be followed by a fifth-shot drop.
The decision should depend on the return and opponent positioning.
Stage 2: Advance Behind the Third Shot
If your third shot limits the opponents’ attacking opportunities, begin moving forward.
Maintain awareness of their paddle preparation and potential return angles.
Avoid committing to more forward movement than the quality of your shot supports.
Stage 3: Establish Balance Before the Next Attack
As your opponent prepares to make contact, reduce momentum and establish a balanced stance.
Be ready to defend a shot toward your feet or redirect a ball to another part of the court.
If necessary, use a controlled reset.
Stage 4: Continue Advancing When Possible
A successful reset may create another opportunity to move forward.
Repeat the movement and recovery process until you reach the non-volley zone line.
Some rallies may require multiple resets.
Others may allow a quicker advance.
The objective is to reach the kitchen in a position where you can compete effectively rather than arriving off balance and vulnerable.
Understand the Importance of Contact Height
The height at which you contact the ball strongly influences your available options during transition.
Below-Net Contact
A low contact point often limits your ability to hit aggressively without lifting the ball.
When defending a shot directed at your feet, prioritize control.
A soft reset or compact defensive response may be appropriate.
Net-Level Contact
When the ball arrives near net height, several options may be available depending on your balance and court position.
A controlled block, soft directional shot, or carefully selected counter may be effective.
Avoid treating every net-level ball as an automatic attacking opportunity.
Above-Net Contact
A higher ball may allow a more aggressive response.
However, the decision should still reflect your court position and the opponents’ readiness.
An elevated ball contacted while reaching or moving backward may not provide a reliable attacking opportunity.
Good transition play depends on recognizing when the ball offers an advantage and when continued defensive control is more appropriate.
Manage Your Footwork Under Pressure
Efficient movement helps players maintain control while advancing.
The transition zone requires more than straightforward running.
Players must stop, react laterally, adjust backward, and move forward again as rallies develop.
Use Small Adjustment Steps
Short adjustment steps help maintain balance when preparing for incoming shots.
They are particularly useful when positioning the body for a low defensive contact.
Avoid taking unnecessarily large steps that make recovery more difficult.
Control Forward Momentum
Running aggressively toward the kitchen can make it difficult to react to a sudden change in ball direction.
Use controlled forward movement and establish balance before opponents contact the ball.
The objective is to maintain the ability to change direction quickly.
Be Prepared to Move Backward
Although advancing is the overall objective, occasional backward adjustments may be necessary.
An opponent may direct a deep shot behind you or force an awkward contact position.
Move as required to play the ball safely.
Do not insist on maintaining forward movement when the incoming shot demands otherwise.
Coordinate Transition Movement in Doubles
Doubles transition requires awareness of both players’ positions.
When partners advance independently without adjusting coverage, opponents may exploit open space.
Move Forward as a Coordinated Team
Ideally, both partners should work toward establishing position at the kitchen line.
However, they may not always advance at exactly the same time.
One player may receive a difficult shot and need to remain farther back.
The other player should recognize the resulting coverage challenges.
Protect the Middle
When one partner moves wide to defend a shot, the other may need to shift toward the middle.
Avoid leaving large gaps between partners.
Communication can help determine who should take a ball directed between the two players.
Avoid Unnecessary Movement
Partners should not move forward simply because the other player advances.
Movement should reflect the ball’s trajectory, available court coverage, and the likelihood of an opponent’s next shot.
A coordinated team makes adjustments together while responding to each player’s immediate responsibilities.
Read Opponent Positioning During Transition
Advanced players evaluate opponents before deciding how to move.
Different situations create different opportunities.
Opponents Established at the Kitchen
When both opponents are balanced at the non-volley zone line, they may be prepared to intercept higher balls.
Prioritize low, controlled shots that reduce their ability to attack.
Advancing behind an elevated ball can be particularly risky.
One Opponent Still Moving
If an opponent is still recovering or moving toward the kitchen, their ability to attack may be limited.
A controlled shot toward their feet or an uncomfortable contact zone may create an opportunity.
However, strong opponents can respond effectively while moving.
Continue evaluating the quality of the next ball.
Opponents Attacking Repeatedly
Against an aggressive team, transitions may require greater patience.
Focus on compact defensive responses and low resets.
Avoid becoming frustrated if you cannot reach the kitchen immediately.
Repeated successful defensive exchanges can reduce pressure and eventually create an opportunity to advance.
Common Transition Zone Mistakes
Several mistakes can make the movement from baseline to kitchen unnecessarily difficult.
Sprinting After Every Third Shot
Advancing without evaluating shot quality may expose you to fast attacks.
Instead, move according to the advantage your previous shot creates.
Hitting While Still Moving Rapidly
Forward momentum can reduce contact accuracy and make soft shots difficult to control.
Establish balance before contact whenever possible.
Trying to Counterattack Every Ball
Not every incoming shot offers a favorable attacking opportunity.
Use controlled blocks and resets when your position is defensive.
Standing Upright Between Shots
An upright stance may make it harder to react to low balls directed toward the feet.
Maintain an athletic ready position during transitions.
Advancing Without Partner Awareness
Poorly coordinated movement can create large gaps between doubles partners.
Communicate and adjust positioning according to the rally.
Staying in the Transition Zone Without a Plan
Although the transition zone is not inherently unsafe, remaining there indefinitely can give opponents repeated opportunities to attack.
Look for chances to improve court position rather than becoming comfortable in a defensive location.
Advanced Pickleball Transition Zone Drills
Structured practice helps players connect shot execution, movement, and tactical decisions.
Drill 1: Stop, Reset, and Advance
Setup: Position one player near the baseline and another at the opposite kitchen line.
Execution:
- The baseline player begins with a controlled drop shot.
- The player moves forward as the shot allows.
- The kitchen-line player delivers a manageable attacking volley.
- The advancing player establishes balance and attempts a reset.
- If the reset is effective, the player moves forward again.
- Continue until the advancing player reaches the kitchen or the rally ends.
Goal: Develop the habit of advancing behind suitable shots and establishing balance before defending.
Drill 2: Split-Step Timing Practice
Setup: One player begins between the baseline and kitchen line. A partner stands on the opposite side of the net.
Execution:
- The feeding player prepares to strike the ball.
- The transitioning player practices timing a small split step or balanced stop.
- The feeding player directs the ball to different reachable locations.
- The transitioning player moves to contact the ball with balance.
- Repeat with varied directions and moderate pace.
Goal: Improve readiness and reaction timing during forward movement.
Drill 3: Three-Reset Challenge
Setup: One player defends from the transition zone while another player attacks from the opposite kitchen line.
Execution:
- The attacking player delivers controlled volleys.
- The defender attempts three consecutive low resets.
- After each reset, the defender recovers into a balanced stance.
- Once three successful resets are completed, switch roles.
- Increase difficulty gradually as consistency improves.
Goal: Build defensive patience and the ability to manage repeated pressure.
Drill 4: Doubles Transition Under Pressure
Setup: Four players begin a normal doubles point.
Execution:
- The serving team starts at the baseline.
- The receiving team attempts to establish kitchen-line position.
- The serving team uses third shots and controlled resets to advance.
- Both partners coordinate movement and middle coverage.
- Continue the point under normal rules.
After each rally, evaluate whether the serving team advanced behind suitable shots and maintained balanced positioning.
Goal: Apply transition-zone decisions in realistic competitive situations.
Develop a Reliable Transition Decision Process
Advanced transition play becomes more consistent when players use a simple decision sequence.
Before moving forward, consider the quality of your outgoing shot.
As your opponent prepares to strike, evaluate whether you are balanced and positioned to respond.
When the ball arrives, select a shot based on contact height, available targets, and your ability to control the return.
After contact, decide whether to advance, remain in position, or recover defensively.
A useful sequence is:
- Assess: Determine whether your shot creates a forward-moving opportunity.
- Advance: Move toward the kitchen while maintaining control.
- Prepare: Establish balance before the opponent’s next contact.
- Respond: Reset, block, counter, or otherwise return the ball appropriately.
- Reassess: Continue forward when the next exchange allows.
This cycle may repeat several times during a single rally.
With practice, players begin recognizing these situations more quickly and responding with greater confidence.
Final Thoughts
A strong pickleball transition zone strategy helps advanced players move toward the kitchen without sacrificing balance, accuracy, or defensive readiness.
Successful transitions are built around controlled movement, well-timed preparation, reliable resets, and awareness of both opponents and doubles partners.
The objective is not to reach the non-volley zone as quickly as possible at any cost.
It is to arrive in a position where you can maintain control, defend effectively, and recognize opportunities to attack.
By practicing deliberate movement and connecting each forward advance to the quality of the rally, you can become more consistent when moving through one of pickleball’s most challenging areas.