
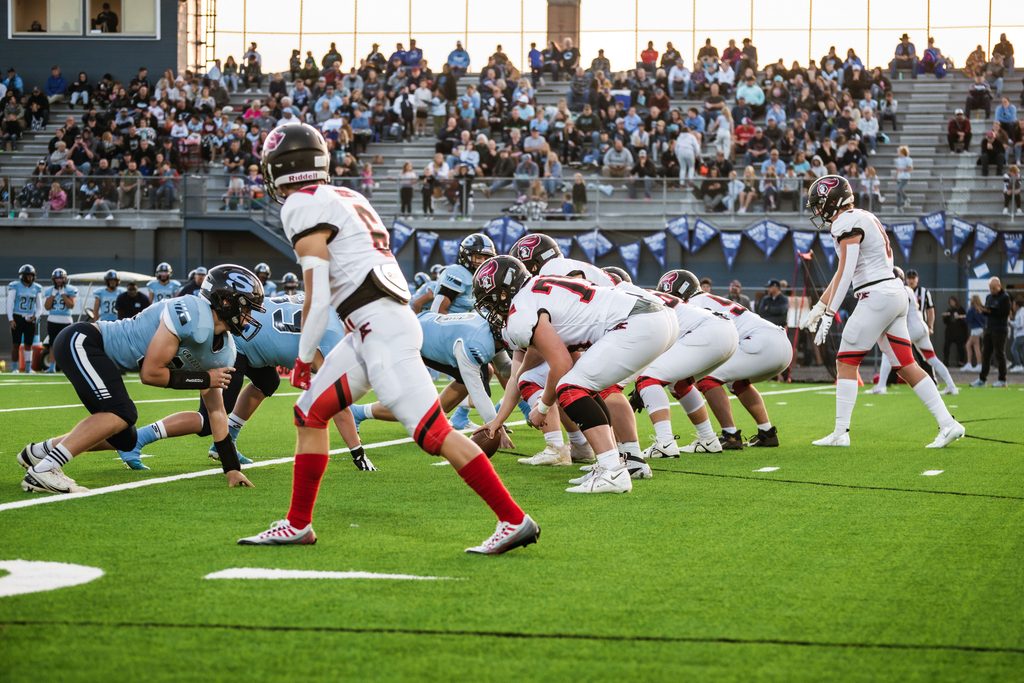
A quarterback steps up to the line of scrimmage and looks across the field. Two safeties are positioned deep, while the cornerbacks line up several yards away from the receivers. The defense appears to be protecting the deeper areas of the field.
The quarterback takes the snap. One safety moves toward the middle, another defender drops into coverage and the defensive formation changes. What looked like one coverage before the snap has become something different.
This is why learning how to read defensive coverages is an important skill for developing American football players.
Defensive coverage influences where passing opportunities may appear, how receivers are defended and which areas of the field are protected. Recognizing these patterns helps quarterbacks and other offensive players understand what they are facing instead of reacting blindly.
However, reading coverage does not mean predicting every defender’s assignment perfectly. Defenses frequently disguise their intentions, rotate after the snap and combine different coverage responsibilities.
The objective is to gather useful clues, recognize likely coverage structures and confirm what the defense is actually doing as the play develops.
This guide explains the most important defensive coverage indicators, common coverage structures and practical ways to improve your recognition skills.
What Does Reading Defensive Coverage Mean?
Reading defensive coverage means observing how defenders align and move to determine how they are protecting against a passing play.
Before the snap, offensive players can examine the positions of safeties, cornerbacks and linebackers. These alignments provide clues about the type of coverage the defense might use.
After the snap, the movement of those defenders helps confirm or challenge the initial expectation.
For example, imagine a cornerback positioned directly across from a wide receiver.
When the receiver begins running, the cornerback follows closely across the field. That movement may suggest a man-coverage responsibility.
In another situation, the cornerback allows the receiver to move inside while remaining responsible for an outside area. That behavior may indicate zone coverage.
These are clues rather than guarantees.
A defender may follow a receiver temporarily within a zone system, and a defensive back may initially appear to be playing man coverage before transitioning into another responsibility.
Effective coverage recognition requires observing multiple defenders and understanding how their movements fit together.
Why Offensive Players Need to Understand Defensive Coverages
Recognizing coverage is useful for several offensive positions.
Quarterbacks need to understand where passing windows may develop and whether defenders are positioned to challenge particular throws.
Receivers benefit from recognizing how defenders are positioned relative to their routes, although any route adjustments must follow the team’s offensive system.
Running backs and tight ends may also need to understand nearby coverage defenders when executing receiving assignments.
Consider a passing play with a receiver running a curl route.
If a defender remains positioned directly underneath the intended catching area, the quarterback may not have a safe throwing window.
Recognizing that positioning helps the quarterback avoid assuming a receiver will be available simply because the route was completed correctly.
Coverage knowledge therefore contributes to better awareness, communication and offensive execution.
It does not replace the quarterback’s assigned progression or the team’s play design.
Start by Identifying the Safeties
One of the most useful starting points when learning how to read defensive coverages is identifying the safeties.
Safeties frequently provide important clues about how the deeper part of the field may be defended.
Their alignment can help distinguish between single-high and two-high coverage structures.
Single-High Safety Alignment
A single-high look typically features one safety positioned deep near the middle of the field.
Another safety may align closer to the line of scrimmage, near a receiver or in a different defensive position.
A single-high structure can be associated with coverages such as Cover 1 or Cover 3.
However, one deep safety does not automatically tell you whether the defense will use man or zone coverage.
The cornerbacks and underneath defenders provide additional information.
Two-High Safety Alignment
A two-high look features two safeties positioned deep, generally on opposite sides of the field.
This structure is often associated with Cover 2, Cover 4 and other split-safety coverage systems.
The safeties may begin at similar depths, but their exact responsibilities depend on the defensive call.
Some defenses also show two deep safeties before rotating into a single-high structure after the snap.
The key lesson is simple: safety alignment gives you a starting hypothesis, not a confirmed coverage call.
Watch Safety Movement After the Snap
Suppose two safeties begin deep before the snap.
As the quarterback receives the football, one safety moves toward the middle while the other rotates toward an underneath responsibility.
That movement may indicate a transition into a single-high coverage structure.
By observing both players rather than only one, the quarterback gains a more complete picture.
This is especially useful because modern defenses frequently attempt to hide their intended coverage until the play begins.
Understand Cornerback Positioning
After identifying the safeties, examine the cornerbacks.
Cornerbacks are generally positioned opposite or near wide receivers, although their alignment varies depending on the defensive scheme.
Three useful details are their distance from the receiver, their inside or outside leverage and their body orientation.
Press and Off Coverage
A cornerback aligned close to the receiver near the line of scrimmage is commonly described as playing press alignment.
A cornerback positioned several yards away is using off alignment.
Press alignment can allow a defender to challenge a receiver’s release. Off alignment gives the defender more space to react to developing routes.
Neither alignment proves whether the defense is using man or zone coverage.
Press techniques can appear in different defensive systems, while off coverage can be used with either man or zone responsibilities.
Inside and Outside Leverage
Leverage describes a defender’s position relative to the receiver.
A defender using inside leverage positions themselves closer to the middle of the field than the receiver.
Outside leverage places the defender closer to the sideline.
These positions can influence which routes are easier to challenge.
For example, a cornerback positioned inside a receiver may be attempting to discourage an immediate inside release or route.
However, the cornerback may also have help from another defender, making the coverage more complicated than one alignment suggests.
The offense should observe leverage as part of the overall defensive structure.
Watch Body Orientation
A cornerback facing the receiver closely may provide a clue about man responsibility.
A cornerback positioned to observe the quarterback and a wider section of the field may suggest zone-related responsibilities.
But defensive techniques vary.
A zone defender may turn and run with a receiver, while a man defender may briefly look toward the quarterback.
Body orientation becomes more useful when combined with safety alignment and post-snap movement.
Recognize Man Coverage and Zone Coverage
Most developing offensive players should first understand the broad distinction between man and zone coverage.
Man Coverage
In man coverage, defenders are generally assigned particular eligible receivers.
A defensive back may follow a receiver across the field or remain tightly connected as the route develops.
Imagine a receiver running a crossing route from right to left.
If the cornerback follows that receiver across the formation, it may suggest man coverage.
However, some zone systems instruct defenders to match receivers in ways that resemble man coverage.
Following a receiver is therefore a useful clue, not definitive proof.
Zone Coverage
In zone coverage, defenders protect designated areas or follow zone-related distribution rules rather than simply tracking one receiver everywhere.
A defender may react to receivers entering or leaving an assigned area.
For example, a cornerback might defend an outside area while another defender protects the inside passing window.
When a receiver crosses from one area to another, coverage responsibility may shift between defenders.
The exact movement depends on whether the defense uses spot-drop zone, pattern-match principles or another system.
Why the Distinction Matters
Recognizing man or zone tendencies helps offensive players understand how passing windows may develop.
Against many man concepts, receiver movement and individual matchups become especially important.
Against zone concepts, the position of defenders relative to the intended passing window is critical.
Still, offenses should not assume that every man coverage can be beaten by one route or that every zone coverage contains the same opening.
The coverage, route combination, defensive technique and timing all matter.
How to Recognize Cover 1
Cover 1 is commonly associated with a single deep safety and man coverage underneath.
The deep safety generally protects the middle of the field, while other defenders handle assigned receivers.
Common Indicators
Possible Cover 1 clues include:
- One safety remaining deep near the middle.
- Cornerbacks maintaining close relationships with particular receivers.
- Defenders following receivers across the field.
- Underneath defenders showing man-related responsibilities.
These observations are most useful when several appear together.
Example: Crossing Route
Imagine a receiver running a shallow crossing route.
The cornerback follows the receiver across the field while the deep safety remains positioned over the middle.
That movement supports the possibility of Cover 1.
However, an isolated defender following a crossing receiver is not enough to confirm the entire coverage.
Offensive players must also consider the movements of other defenders.
What Offensive Players Should Notice
The quarterback should pay attention to whether the intended receiver has usable separation and whether the deep safety can influence the passing lane.
A receiver appearing open underneath may still be vulnerable to a nearby defender.
The key is evaluating the actual throwing window rather than relying entirely on the coverage label.
How to Recognize Cover 2
Traditional Cover 2 zone divides the deep part of the field into two main areas, with a safety responsible for each deep half.
Underneath defenders protect shorter areas according to their assignments.
Cover 2 can also describe related variations, including Cover 2 man, so identifying two safeties alone does not establish every defender’s responsibility.
Common Indicators
Traditional Cover 2 zone may show:
- Two safeties remaining deep after the snap.
- Cornerbacks occupying or influencing underneath outside areas.
- Linebackers protecting intermediate or underneath passing lanes.
- Safeties dividing responsibility across the deeper portions of the field.
Example: Outside Receiver
Imagine an outside receiver moving downfield.
The cornerback initially positions themselves underneath or near the receiver before the deep safety becomes responsible for the deeper area.
That exchange may suggest traditional Cover 2 zone.
However, specific coverage techniques vary by team.
Some systems use cornerbacks to redirect receivers, while others apply different rules based on route distribution.
What Offensive Players Should Notice
Rather than automatically targeting a particular area, observe where the cornerback and deep safety are positioned as the route develops.
The throwing lane may appear open from one angle but be protected by a defender moving toward the ball.
Recognizing coverage helps the quarterback understand the potential risk, but actual ball placement and timing remain essential.
How to Recognize Cover 3
Cover 3 is generally a three-deep coverage structure.
Two outside defenders and one middle defender protect the three deep areas, while other defenders handle underneath responsibilities.
Many Cover 3 looks begin with a single-high safety alignment, although defenses can disguise the coverage.
Common Indicators
Possible Cover 3 clues include:
- One deep safety moving or remaining toward the middle.
- Outside defenders gaining depth into separate deep areas.
- Underneath defenders spreading across shorter passing zones.
- Defensive movement forming three deep coverage responsibilities.
Example: Sideline Route
Imagine an outside receiver running vertically toward the sideline.
The cornerback retreats to protect the deep outside portion of the field while the middle safety remains responsible for the deep central area.
Another defender moves underneath.
The combined movement may indicate Cover 3.
What Offensive Players Should Notice
A quarterback should identify the depth and location of the defenders rather than assuming that the area between them is automatically open.
Zone defenders can close throwing windows quickly, especially when they anticipate a route.
The quarterback also needs to account for the relationship between underneath coverage and the deep defenders.
How to Recognize Cover 4
Cover 4, often called quarters coverage, generally divides the deep field into four quarters.
It commonly begins with two deep safeties and cornerbacks positioned to protect outside deep areas.
However, modern quarters schemes frequently use pattern-matching principles, meaning defenders’ responsibilities can change according to receiver releases and route combinations.
Common Indicators
Cover 4 may involve:
- Two safeties positioned deep before the snap.
- Cornerbacks maintaining depth or responding to vertical routes.
- Four defenders sharing deep coverage responsibilities.
- Defenders matching route patterns based on the defensive system.
Example: Vertical Routes
Imagine two outside receivers running vertical routes.
The cornerbacks carry or match those routes according to their assignments while the safeties react to routes developing inside.
That response may be consistent with quarters coverage.
However, the defense could also be using a different two-high coverage variation.
What Offensive Players Should Notice
Cover 4 is more than simply placing four defenders deep.
Offensive players need to recognize that defensive responsibilities may change based on the routes entering different areas.
At the intermediate level, the objective is to recognize the general structure and understand why the defenders may move differently from a basic spot-drop zone.
Detailed quarters-match rules belong to more advanced study.
Quick Comparison of Common Defensive Coverages
| Coverage | Common deep structure | Typical characteristic |
|---|---|---|
| Cover 1 | One deep safety | Man coverage with deep middle help |
| Cover 2 Zone | Two deep safeties | Deep halves with underneath zone responsibilities |
| Cover 3 | Three deep defenders | Three deep areas with underneath coverage |
| Cover 4 | Four deep defenders | Deep quarters, often with pattern-matching rules |
These descriptions represent common teaching structures, not every variation used by defensive teams.
A coverage shell is useful for narrowing possibilities, but it should never replace watching the defenders’ actual responsibilities.
How Defensive Disguises Can Mislead Offensive Players
Defenses do not always line up in the exact structure they intend to use.
A defense might initially present two deep safeties to suggest one type of coverage, then rotate a safety after the snap to create a different arrangement.
Cornerbacks may also align in ways that suggest man coverage before dropping into zone responsibilities.
This technique is called coverage disguise.
Its purpose is to make offensive recognition more difficult and potentially cause incorrect decisions.
Example: Two-High to Single-High Rotation
Imagine a defense showing two safeties deep before the snap.
The quarterback initially expects a two-high coverage structure.
Immediately after the snap, one safety rotates toward an underneath assignment while the other moves toward the deep middle.
The defense may now be operating from a single-high structure.
If the quarterback continues using the original two-high assumption, the passing window may not be where expected.
Avoid Committing Too Early
The best response is not to abandon pre-snap observations.
Those observations still provide useful starting information.
Instead, treat them as an initial assessment that must be checked against post-snap movement.
A developing quarterback should learn to recognize when the defense confirms the expected structure and when it changes.
Read the Defense Before and After the Snap
A practical recognition process has two stages.
Stage 1: Before the Snap
Begin by identifying the overall defensive picture.
First, locate the safeties and observe whether the defense presents a single-high or two-high structure.
Next, examine the cornerbacks. Notice their distance from receivers, leverage and body position.
Then look at the linebackers and other underneath defenders.
Ask yourself:
- Where are the deep safeties?
- How are the cornerbacks aligned?
- Which defenders appear responsible for underneath areas?
- Does the structure suggest man or zone tendencies?
- Are defenders shifting before the snap?
These questions help organize observations without requiring an immediate perfect answer.
Stage 2: After the Snap
Once the play begins, observe how the defensive structure develops.
Watch the safeties first to see whether they maintain their original positions or rotate.
Then observe whether cornerbacks follow receivers, gain depth or pass routes into other coverage areas.
Notice the movement of linebackers and underneath defenders.
The purpose is to confirm or revise the expected coverage while continuing to execute the assigned offensive play.
Experienced quarterbacks eventually process this information rapidly, but intermediate players should first build accuracy through slower practice and film review.
Three Practical Coverage Recognition Examples
Example 1: One Deep Safety and Following Cornerbacks
Before the snap, one safety stands deep near the middle.
The cornerbacks align close to receivers.
After the snap, the cornerbacks follow their assigned receivers across different route directions while the safety remains deep.
This combination is consistent with a Cover 1 structure.
The quarterback should still observe the remaining defenders and the intended throwing window before making a decision.
Example 2: Two Deep Safeties and Cornerbacks Staying Underneath
Two safeties begin deep on opposite sides.
After the snap, both maintain deep-half responsibilities while the cornerbacks handle shallower outside areas.
This combination supports a traditional Cover 2 zone diagnosis.
The important observation is how the defenders divide the field, not simply that two safeties were visible before the snap.
Example 3: Single-High Safety With Corners Dropping Deep
One safety moves toward the deep middle.
Both outside cornerbacks gain depth into their respective outside areas.
Underneath defenders spread across the shorter passing zones.
These movements suggest a Cover 3 structure.
Again, offensive players should confirm the pattern rather than relying on the initial alignment alone.
Common Mistakes When Reading Defensive Coverages
Developing players often make recognition errors because they focus on a single clue.
Assuming Safety Alignment Confirms Coverage
One-high and two-high looks narrow the possibilities but do not prove a specific coverage.
Improvement: Use safety positioning as the first observation, then confirm it through cornerback and underneath-defender movement.
Watching Only One Defender
A quarterback might identify one cornerback following a receiver and immediately conclude that the entire defense is playing man coverage.
Improvement: Observe the relationship between multiple defenders whenever possible.
Ignoring Post-Snap Rotation
Defensive alignments can change after the ball is snapped.
Improvement: Practice watching safety movement immediately after the snap during film study.
Confusing Alignment With Assignment
A cornerback standing close to a receiver is not necessarily assigned man coverage.
Improvement: Learn the difference between where a defender starts and what they actually do during the play.
Assuming Every Coverage Has One Guaranteed Weakness
Coverage structures have different strengths and vulnerabilities, but defensive techniques and offensive play design affect whether a particular passing window is available.
Improvement: Evaluate the actual defender positioning instead of forcing a throw toward an area that is theoretically open.
Trying to Identify Every Defensive Detail
Intermediate quarterbacks can become overwhelmed when attempting to diagnose the entire defensive scheme at once.
Improvement: Begin with a small set of reliable observations and add complexity as recognition improves.
Practice Drills to Improve Coverage Recognition
Understanding coverage diagrams is useful, but recognition becomes more reliable through repetition.
These exercises help develop the ability to connect defensive alignment with actual movement.
Drill 1: Identify the Safety Shell
Purpose: Recognize single-high and two-high starting structures.
Ask a coach or training partner to display paused football clips before the snap.
Identify whether the defense appears to show one or two deep safeties.
Record your initial observation.
Play the clip and check whether the defense maintains or changes its structure.
Complete approximately 10 repetitions, reviewing mistakes afterward.
Drill 2: Predict and Confirm Coverage
Purpose: Improve the connection between pre-snap clues and post-snap confirmation.
Pause a play immediately before the snap.
Identify two possible coverage structures based on the defensive alignment.
Resume the clip and observe the safeties, cornerbacks and underneath defenders.
Compare the actual movement with your initial expectations.
Avoid treating incorrect predictions as failures. The exercise is designed to improve recognition through feedback.
Drill 3: Man-or-Zone Movement Recognition
Purpose: Recognize broad coverage tendencies.
Use short clips of completed passing plays.
Observe whether defenders track particular receivers or maintain zone-related relationships as routes develop.
Record the apparent coverage tendency, then review the play with a knowledgeable coach.
Include examples of pattern-match coverage so you learn that defender movement does not always fit a simple man-or-zone distinction.
Drill 4: Defensive Rotation Recognition
Purpose: Identify coverage changes after the snap.
Select clips featuring safeties moving into different coverage responsibilities.
Pause before the snap and note the starting alignment.
Resume the play slowly, concentrating on safety rotation.
Identify whether the deep coverage structure remained the same or changed.
This exercise helps develop awareness of disguised defensive looks.
Drill 5: Passing Window Observation
Purpose: Connect coverage recognition with potential throwing opportunities.
Watch a passing play from a wide camera angle.
Pause shortly after the receivers begin their routes.
Identify where defenders are positioned relative to the intended receiving areas.
Continue the play and observe how those passing windows change.
Discuss whether a particular throw would have been available at the actual release time, considering the quarterback’s progression and the speed of the defenders.
The goal is not to invent an alternative play after seeing the result. It is to understand how defensive positioning affects a developing passing opportunity.
Use Film Study to Build Coverage Recognition
Film study is one of the most practical ways to develop defensive recognition without requiring full-speed repetitions.
A developing player can begin with a small collection of clips showing clearly identifiable coverage structures.
For each clip, record:
| Observation | Question |
|---|---|
| Safety alignment | Single-high or two-high? |
| Cornerback positioning | Press, off, inside or outside leverage? |
| Initial movement | Do safeties rotate or remain deep? |
| Receiver response | Do defenders follow routes or pass responsibilities? |
| Underneath coverage | Where do linebackers and other defenders move? |
| Final assessment | Which coverage structure best explains the movement? |
Include examples where the initial alignment is misleading.
These clips are especially valuable because they teach players not to treat pre-snap appearances as guaranteed coverage assignments.
Review One Coverage Family at a Time
Instead of studying every coverage in one session, concentrate on a manageable group.
For example, begin by comparing Cover 1 and Cover 3.
Both can use a single-high safety, but their underneath and outside coverage responsibilities are different.
Once the distinction becomes easier to recognize, move to Cover 2 and Cover 4.
Both commonly use two-high structures, yet their deep responsibilities differ.
This approach helps connect similar starting looks with different defensive behavior.
Build a Simple Coverage Recognition Routine
Intermediate players can develop better recognition through a short, consistent practice routine.
| Practice Phase | Activity | Approximate Time |
|---|---|---|
| Safety recognition | Identify one-high and two-high structures | 5 minutes |
| Cornerback observations | Study alignment and leverage | 5 minutes |
| Post-snap confirmation | Review defensive movement | 10 minutes |
| Coverage comparison | Compare two similar coverage families | 10 minutes |
| Review | Record incorrect assumptions and corrections | 5 minutes |
This routine can be adapted to the player’s experience and available film.
Accuracy matters more than reviewing a large number of plays.
It is better to understand why five clips show different coverage responsibilities than to label fifty clips without meaningful review.
When Are You Ready for Advanced Coverage Recognition?
An intermediate player has a useful foundation when they can recognize common coverage structures without relying only on the number of deep safeties.
They should also understand that a defense may disguise coverage and that defenders can use techniques that resemble different coverage systems.
Advanced recognition involves combining several types of information, including defensive personnel, pressure indicators, coverage rotation and coordinated passing progressions.
Those topics require a deeper understanding of offensive and defensive systems.
At this stage, prioritize identifying common coverage families and recognizing meaningful defender movement.
There is no need to diagnose every variation perfectly before improving your next play.
Final Thoughts: Read the Movement, Not Just the Alignment
Learning how to read defensive coverages begins with a straightforward habit: observe the defense before the snap, then confirm what it actually does when the play begins.
Safeties provide useful clues about the deeper coverage structure. Cornerbacks reveal information through alignment, leverage and movement. Linebackers and other underneath defenders help complete the picture.
Cover 1, Cover 2, Cover 3 and Cover 4 provide practical starting points, but each coverage can include variations that make simple visual rules less reliable.
The most important skill is recognizing patterns without assuming that the first appearance tells the entire story.
Practice identifying defensive alignments, review post-snap movement and study examples where defenders change their responsibilities.
Over time, these habits can help you develop a more accurate understanding of passing situations and make better decisions within your team’s offensive system.
Continue learning through our Intermediate American Football Guides, or explore the American Football Learning Path for structured courses that build football knowledge and playing skills progressively.