
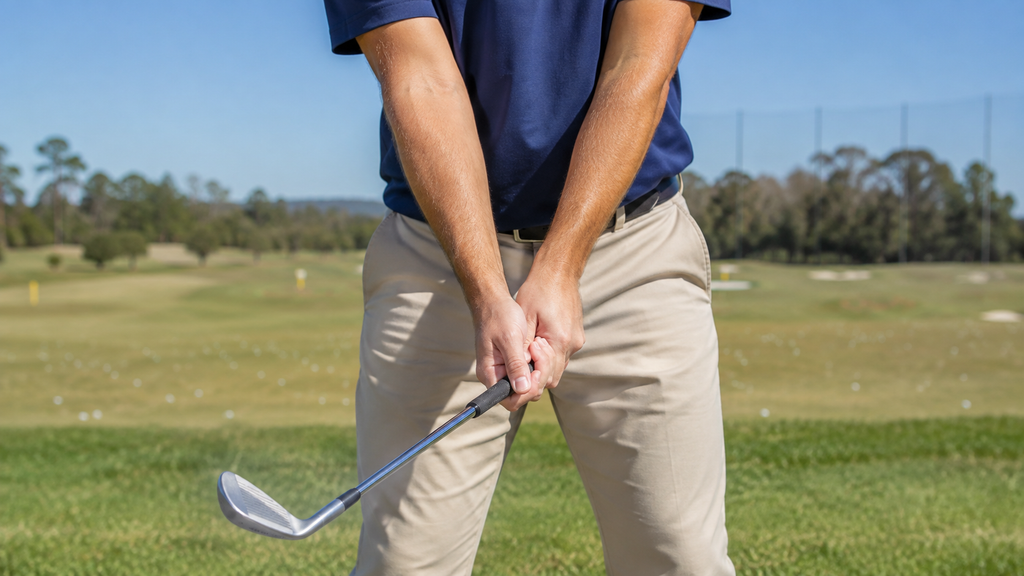
The golf grip is the way your hands connect to the club, and that connection has a direct influence on how well you can control the club throughout the swing. A good grip does not require squeezing the handle or forcing your hands into an uncomfortable position. It should allow both hands to work together while giving you a secure, repeatable connection to the club.
Learning how to hold a golf club starts with three fundamentals: where the handle sits in your hands, how your hands are positioned around it, and how much pressure you apply. Small differences in these areas can affect how easily the clubface returns to a consistent position.
For a right-handed golfer, the lead hand is the left hand and the trail hand is the right hand. For a left-handed golfer, those roles are reversed.
Why the Golf Grip Matters
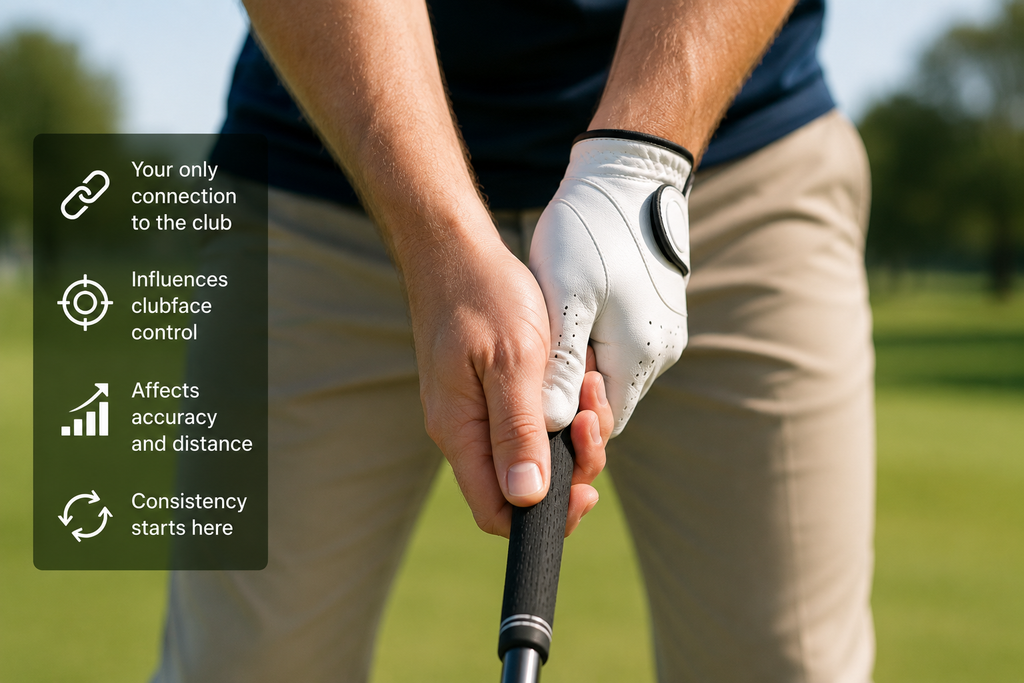
Your hands are the only part of your body in direct contact with the golf club. That makes the grip an important link between the movement of your body and the movement of the club.
A functional grip helps you:
- • Hold the club securely without excessive tension.
- • Keep the hands working together rather than independently.
- • Maintain control of the club during the motion.
- • Deliver the clubface more consistently.
The clubface is the part of the clubhead designed to strike the ball. Its orientation has an important influence on the direction of a golf shot, so the way your hands are positioned on the handle matters.
A grip that changes every time you pick up a club also changes the relationship between your hands and the clubface. Even if everything else feels similar, inconsistent hand placement makes consistent club control more difficult.
The objective is not to find a grip that looks perfect from every angle. It is to establish a sound starting position that you can reproduce.
Where the Club Sits in the Lead Hand
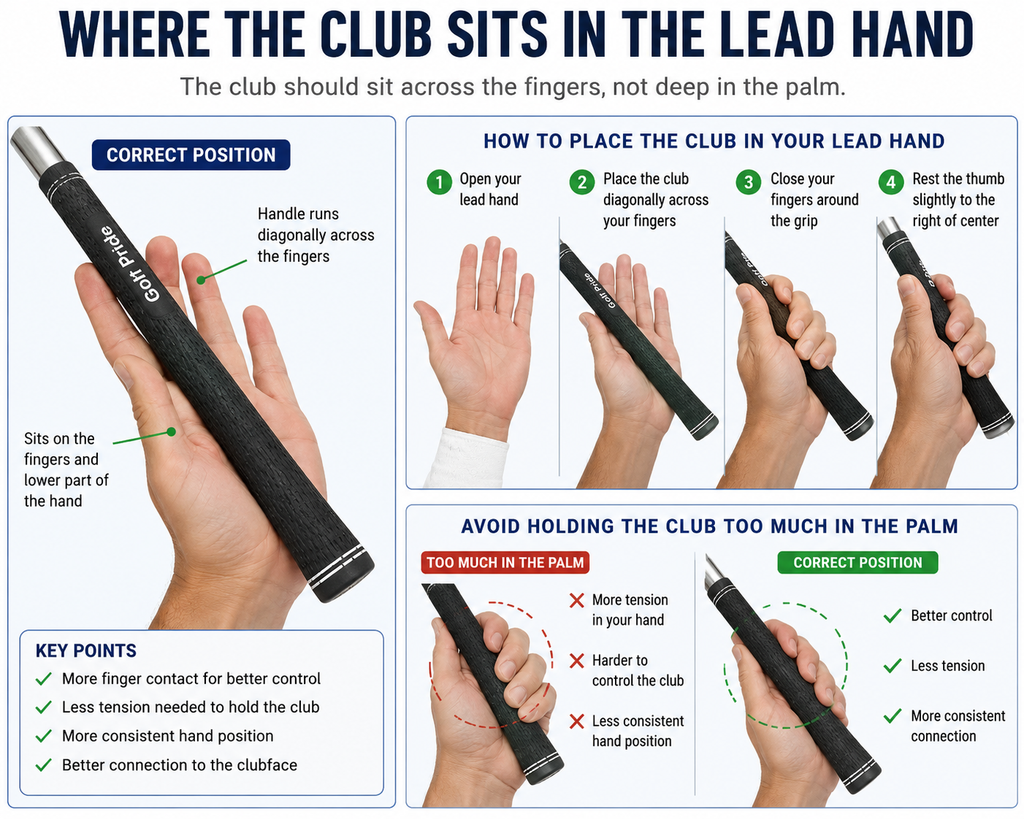
A reliable grip begins with the lead hand.
Hold the club in front of you so you can see the handle clearly. Rather than placing the handle deep across the center of your palm, position it more through the fingers and the lower portion of the hand.
The handle should run diagonally across the lead hand. It generally enters near the base of the little finger and runs toward the area around the index finger.
Then close the fingers around the handle before settling the upper part of the hand over it.
This finger-oriented placement matters because your fingers are well suited to securing the club while allowing the wrists and hands to remain functional. When the handle sits excessively high in the palm, beginners often compensate by squeezing harder to keep the club secure.
That creates an important cause-and-effect relationship:
Handle too much in the palm → more effort needed to secure the club → increased hand and forearm tension → less freedom to control and move the club naturally.
You should feel that the fingers have a meaningful hold on the club rather than feeling as though the handle is simply pressed against an open palm.
Lead-Hand Position
Once the handle is positioned correctly, close your lead hand around it.
A useful beginner starting point is a neutral grip, where the hand sits in a relatively balanced position rather than being rotated dramatically to either side.
When you look down at your lead hand in a normal golf position, seeing approximately two knuckles is a common neutral reference. This is a checkpoint rather than an exact requirement. Hand size, anatomy, and how the club sits in the fingers can change what an individual golfer sees.
The lead thumb should rest along the upper portion of the handle, slightly to the trail-hand side of center rather than being stretched dramatically down the shaft. Keep the thumb comfortably positioned rather than pressing it hard against the grip.
The thumb and index finger will form a visible crease or “V” shape. In a conventional neutral grip, that crease generally points somewhere toward the area between the golfer’s chin and trail shoulder.
Avoid forcing your hand into a position simply to make a visual checkpoint look exact. The important combination is a secure finger-based hold, a reasonably neutral hand orientation, and a position you can reproduce.
Adding the Trail Hand
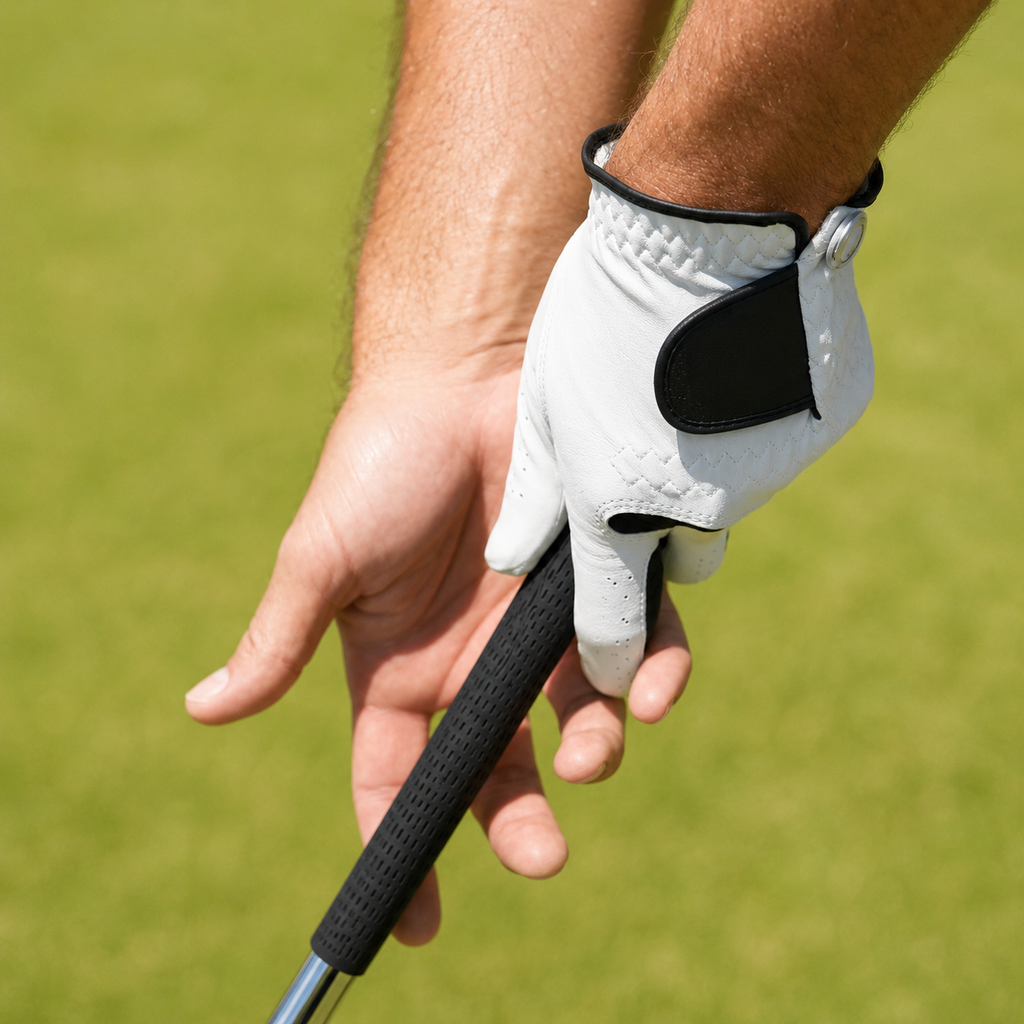
With the lead hand established, add the trail hand so the two hands function as one unit on the club.
Bring the trail hand to the handle from the side. The fingers wrap around the grip, while the lifeline area of the trail palm—the fleshy crease running through the palm—fits over or alongside the lead thumb.
This relationship helps the hands sit closely together.
The trail thumb then rests on the opposite side of the handle from the lead thumb. It should sit naturally rather than being stretched straight down the center of the grip.
The goal is to create a unified connection. You should not see a large gap between the hands or feel as though each hand is holding a separate section of the club.
If the trail hand rotates too far underneath the handle, its palm begins facing excessively upward. If it rotates too far over the top, the palm faces excessively downward. Either extreme changes the relationship between the hands and clubface.
A useful check is to notice whether the palms feel generally opposed to one another rather than working in conflicting directions.
The Three Common Golf Grip Styles
Once both hands are positioned on the club, you need to decide how they connect. There are three common styles: overlapping, interlocking, and ten-finger.
All three can produce a functional golf grip. The best choice is the one that allows you to connect your hands securely and comfortably without distorting their basic position.
Overlapping Grip
In an overlapping grip, the little finger of the trail hand rests over the area between the index and middle fingers of the lead hand.
This style is widely used because it connects the hands without locking them together tightly.
Golfers with larger hands may find the overlap comfortable, but hand size alone does not determine which grip a player should use.
Interlocking Grip
In an interlocking grip, the little finger of the trail hand and the index finger of the lead hand interlock.
This creates a close physical connection between the hands. Some golfers with smaller hands find it secure and comfortable, although golfers of many different hand sizes use it successfully.
The fingers should interlock naturally. Jamming them deeply together can create unnecessary pressure and discomfort.
Ten-Finger Grip
With the ten-finger grip, sometimes called a baseball-style grip, all ten fingers contact the club without an overlap or interlock.
The hands still need to sit closely together. A ten-finger grip should not become two separated hands holding different parts of the handle.
Some beginners find this style intuitive because it can feel familiar and gives all the fingers direct contact with the grip.
There is no universal rule requiring beginners to use one of these three styles. Experimenting with the connection between the hands is reasonable, but once you find a comfortable style, use it consistently enough to develop a repeatable grip.
Understanding Grip Strength
One potentially confusing piece of golf terminology is grip strength.
A strong or weak golf grip does not describe how tightly you squeeze the club. It describes how the hands are rotated around the handle.
Neutral Grip
In a neutral grip, the hands sit in a relatively balanced position on the handle. This is a useful reference position for learning because neither hand is rotated dramatically away from a conventional starting position.
Strong Grip
A strong grip means the hands are rotated more toward the trail side of the golfer on the handle.
For a right-handed golfer, that means the hands are rotated more to the right when viewed from the golfer’s perspective. A left-handed golfer sees the mirror image.
The golfer will generally see more of the lead-hand knuckles than with a neutral grip.
Weak Grip
A weak grip means the hands are rotated more toward the lead side.
For a right-handed golfer, that means more rotation to the left; for a left-handed golfer, the direction is reversed.
The golfer will generally see fewer lead-hand knuckles.
These positions alter how the hands relate to the clubface, which can influence how easily the face opens or closes during the motion. Strong and weak are therefore descriptions, not judgments that one grip is powerful and another is ineffective.
A neutral position is a practical reference for a beginner because it provides a balanced starting point from which grip consistency can be learned.
Did you know?
Whimsical Names: Before clubs had numbers, they had fun names like “niblicks” and “longnoses”.
How Tightly Should You Hold the Club?
The club needs to be held securely enough that it will not move unpredictably in your hands, but squeezing as hard as possible is unnecessary.
Think secure but relaxed.
You should be able to feel the club clearly in your fingers without excessive tension spreading through your hands and forearms. If your knuckles are whitening, your forearms feel rigid, or maintaining the grip feels physically tiring, you are probably applying more pressure than necessary.
Too much pressure can make the entire connection rigid. Because the hands and wrists need to respond to the movement of the club, excessive tension can interfere with natural movement and make controlling the club more difficult rather than easier.
Too little pressure creates the opposite problem. If the handle shifts or twists noticeably in your hands, the connection is not secure enough.
A useful distinction is:
Firm enough to control the club, relaxed enough to let it move.
Grip pressure should also remain reasonably consistent. Starting relaxed and then suddenly squeezing during the motion changes the way your hands interact with the club.
Common Beginner Grip Mistakes
Several grip problems appear frequently when golfers are learning how to hold a golf club.
Holding the Club Too Much in the Palms
When the handle sits too high across the palms, it can become harder to secure the club without adding tension.
Correction: Rebuild the lead-hand grip with the handle running more diagonally through the fingers and lower portion of the hand before closing the hand around it.
Trail Hand Too Far Underneath or Over the Handle
Excessive rotation of the trail hand changes its relationship with the lead hand and clubface.
Correction: Return the trail hand to a more neutral position, with the palm generally opposing the lead hand and the lifeline fitting comfortably around the lead thumb.
Squeezing Too Tightly
Beginners sometimes squeeze because they are worried about losing control of the club. The extra pressure can produce unnecessary tension in the hands and forearms.
Correction: Build the grip securely with the fingers first, then deliberately soften excess pressure without allowing the handle to move.
Leaving a Gap Between the Hands
Separated hands make it harder for the two hands to function as a coordinated connection.
Correction: Move the trail hand toward the lead hand and use your chosen overlap, interlock, or ten-finger connection without forcing the hands together.
Constantly Changing the Grip
Changing hand position after every poor shot makes it difficult to determine whether the grip itself is actually the problem.
Correction: Establish clear visual checkpoints and practice returning your hands to the same position repeatedly.
How to Check Your Grip
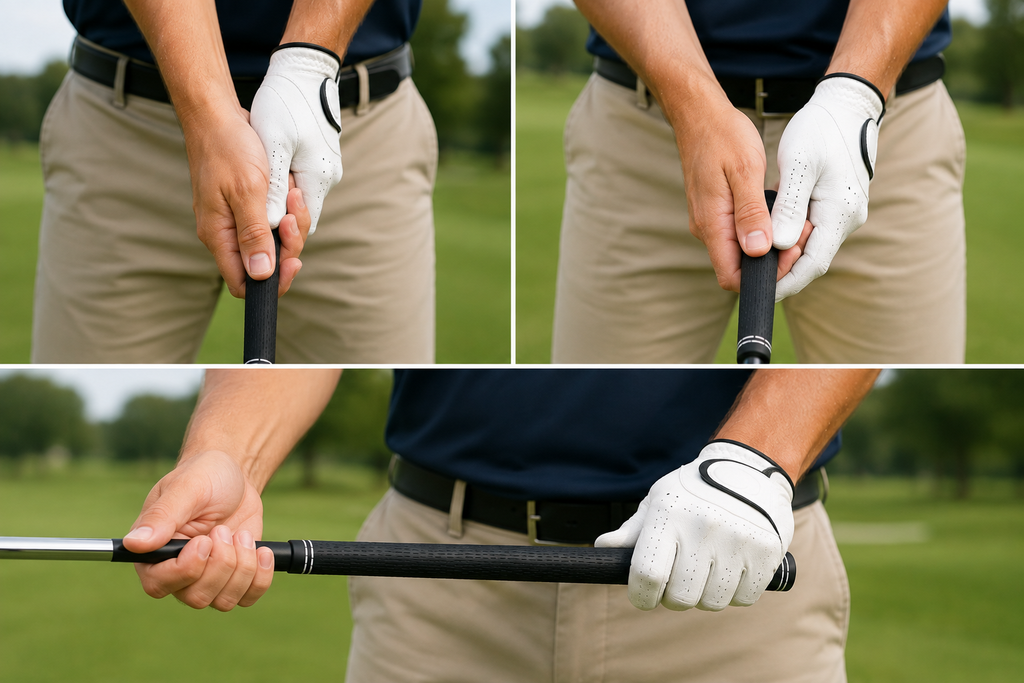
A beginner can perform several useful checks before hitting a ball.
First, look at where the handle enters the lead hand. It should sit primarily through the fingers and lower portion of the hand rather than running straight across the center of the palm.
Next, close the lead hand and check its orientation. Approximately two visible knuckles is a useful neutral reference for many golfers.
Add the trail hand and check that it fits closely against the lead hand. The trail palm should relate naturally to the lead thumb, and the hands should feel connected rather than separated.
Then check pressure. Hold the club securely and deliberately remove any unnecessary squeezing from the fingers and forearms.
Finally, repeat the process.
The most useful grip is not one you manage to create correctly once. It is one you can reproduce whenever you pick up the club.
Beginner Grip Practice
You can improve grip consistency without hitting golf balls. In fact, removing the ball lets you concentrate entirely on hand placement.
Use this simple routine:
- Place the lead hand. Set the handle diagonally through the fingers and close the hand around it.
- Add the trail hand. Fit it closely against the lead hand using your chosen overlapping, interlocking, or ten-finger connection.
- Check alignment. Look at your lead-hand knuckles, thumb positions, and the relationship between the palms.
- Relax the pressure. Keep the club secure while releasing unnecessary tension.
- Reset and repeat. Take both hands off the club and rebuild the grip from the beginning.
Perform the sequence slowly enough to notice where each hand goes. The objective is repeatability rather than speed.
As the process becomes familiar, you should need less conscious effort to place your hands in the same position. That consistency gives you a dependable connection to the club before you begin learning the other elements of golf setup.
Looking for your first set of golf clubs?

Golf Club Sets
Home SHOP BY CATEGORY Drivers Fairway Woods Hybrids Irons Wedges Putters Golf Club Sets Accessories Golf Club Sets Choosing individual clubs is one way to build a bag but sometimes it’s easier to start with a complete setup built for your…
Key Takeaways
- • Place the club primarily through the fingers and lower portion of the lead hand rather than excessively in the palm.
- • Build a neutral, repeatable relationship between the lead hand, trail hand, and clubface.
- • Overlapping, interlocking, and ten-finger grips can all work; choose a style that connects your hands comfortably and securely.
- • Remember that strong and weak describe hand orientation, not grip pressure.
- • Hold the club securely without excessive squeezing, and practice rebuilding the same grip repeatedly.
With your hands connected to the club consistently, the next part of a reliable golf setup is learning how to position your body. Golf Stance and Posture for Beginners builds that foundation by establishing a stable, athletic position before the swing begins.
Previous: What to Bring for Your First Round of Golf >>>
Next: Golf Stance and Posture for Beginners >>>