
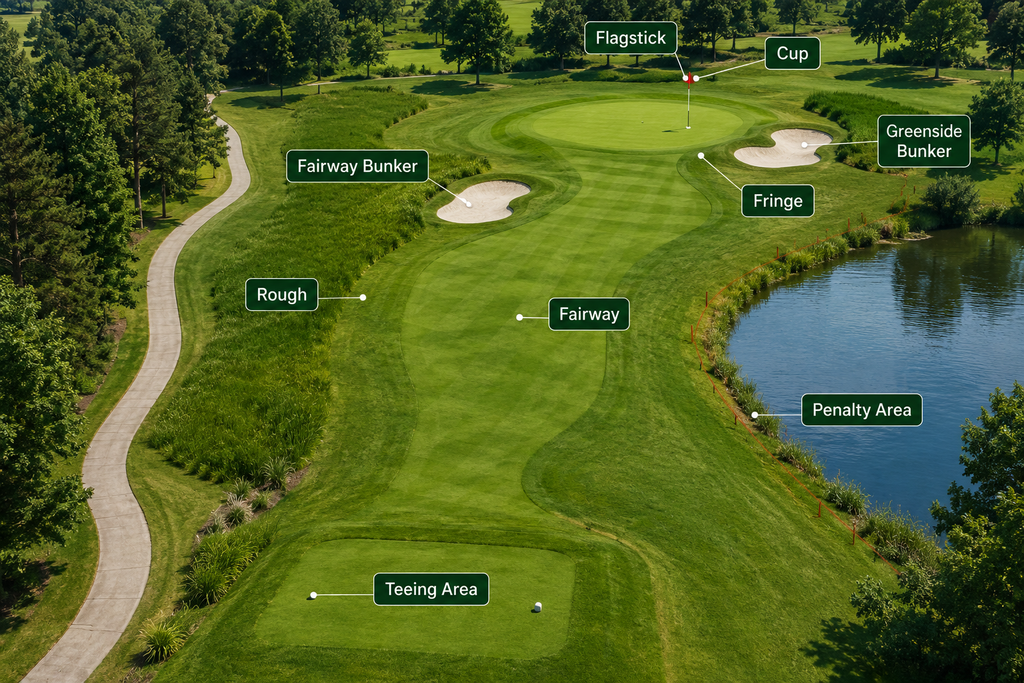
When you first visit a golf course, the layout can seem complicated. You may see closely mown grass, longer rough, sand bunkers, water, trees, paths, flags, several sets of tee markers, and practice areas—all serving different purposes.
Understanding the parts of a golf course makes that environment much easier to read. Each hole has a defined starting area and finishing point, with different types of ground and obstacles between them. Once you can recognize these areas, course maps, signs, broadcasts, and conversations with other golfers become much easier to understand.
This lesson focuses on golf course anatomy: what the main areas are, where you will usually find them, and what they are used for.
How a Golf Course Is Organized
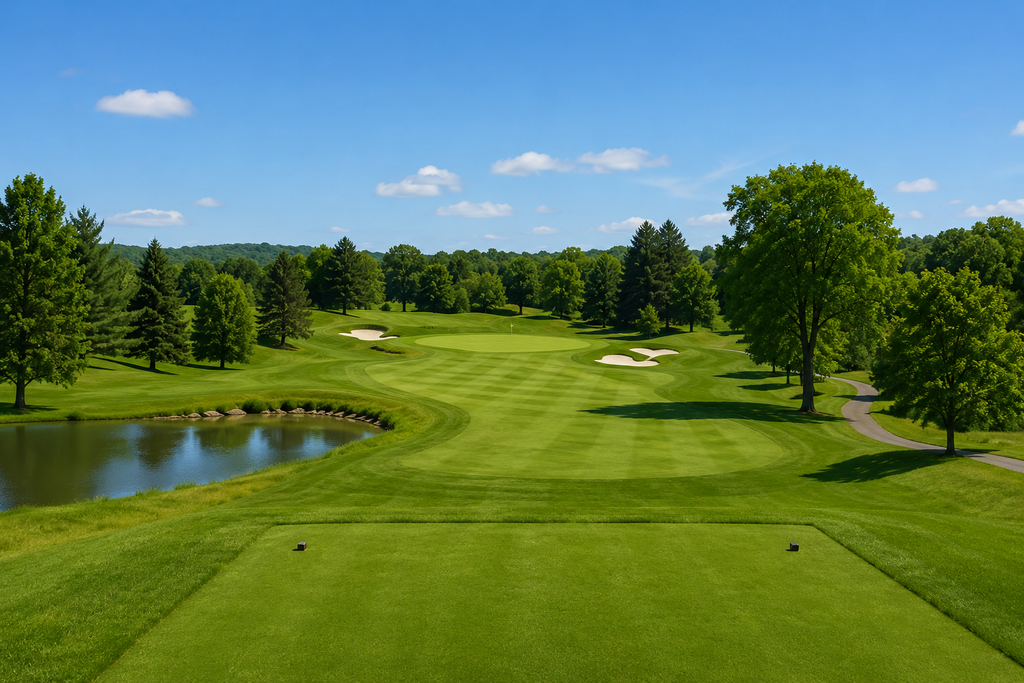
A golf course is divided into individual holes. Each hole is a separate section of the course with its own starting area and putting green.
Many full-size golf courses have 18 holes, numbered 1 through 18. Courses with 9 holes are also common. A golfer can play a nine-hole round, or on some nine-hole courses play the same general layout twice to complete 18 holes.
On an 18-hole course, holes 1 through 9 are called the front nine, while holes 10 through 18 are called the back nine.
Although every hole has a beginning and an end, the land between those points can vary dramatically. One hole might be relatively straight and open. Another might curve around trees, cross rolling terrain, or include bunkers and water.
That variation is one of golf’s defining characteristics: unlike a basketball court or tennis court, a golf course does not have one standardized playing-field layout.
The Teeing Area

The teeing area is where a golfer begins each hole. It provides the designated starting location for the first stroke of that hole.
You will normally see two tee markers placed on the ground to identify a particular starting position. Tee markers can be blocks, spheres, posts, stones, or other shapes, and courses often use different colors or designs to distinguish one set of tees from another.
A single hole commonly has several sets of tee markers positioned at different locations. You might see one set farther back, another farther forward, and additional sets between them. Each set creates a different starting point for the same hole.
Changing the starting position can change more than the total distance to the green. Because tees may be positioned at different angles or on different parts of the property, a hole can also look somewhat different depending on which set is being used. Bunkers, water, trees, and other course features may appear closer, farther away, or at a different angle from one teeing location than from another.
The teeing area has a more specific meaning than simply the entire patch of closely mown grass where the tee markers are located. Under the Rules of Golf, the teeing area for a particular set of markers is a defined rectangular area. Its front edge is established by the line between the two tee markers, and the area extends two club-lengths backward from that line. This is the defined area from which a player begins the hole when using that set of tees.
Beginners may also notice that the teeing ground itself is usually maintained differently from the surrounding rough. It is commonly level or relatively level and closely mown to provide a suitable starting surface. On many holes – especially longer ones – the golfer can place the ball on a tee, a small device that raises the ball above the ground for the opening stroke. The tee and the teeing area are different things: the tee is the small piece of equipment, while the teeing area is the defined part of the course.
You may hear golfers casually refer to this part of the course as the “tee box.” That expression is widely used in everyday golf conversation, but teeing area is the term used in the Rules of Golf.
For now, the important point is to recognize the teeing area as the defined starting area of a golf hole and understand why a course provides multiple sets of tee markers. Deciding which set of tees best suits a golfer’s ability and playing distance is a separate subject covered later in the course.
Did you know?
The Longest Course on Earth: If you want a real road trip, head to the Nullarbor Links in Australia. It is the longest golf course in the world, spanning an incredible 1,365 kilometers (848 miles). It has one hole in each participating town along the Eyre Highway!
The Fairway
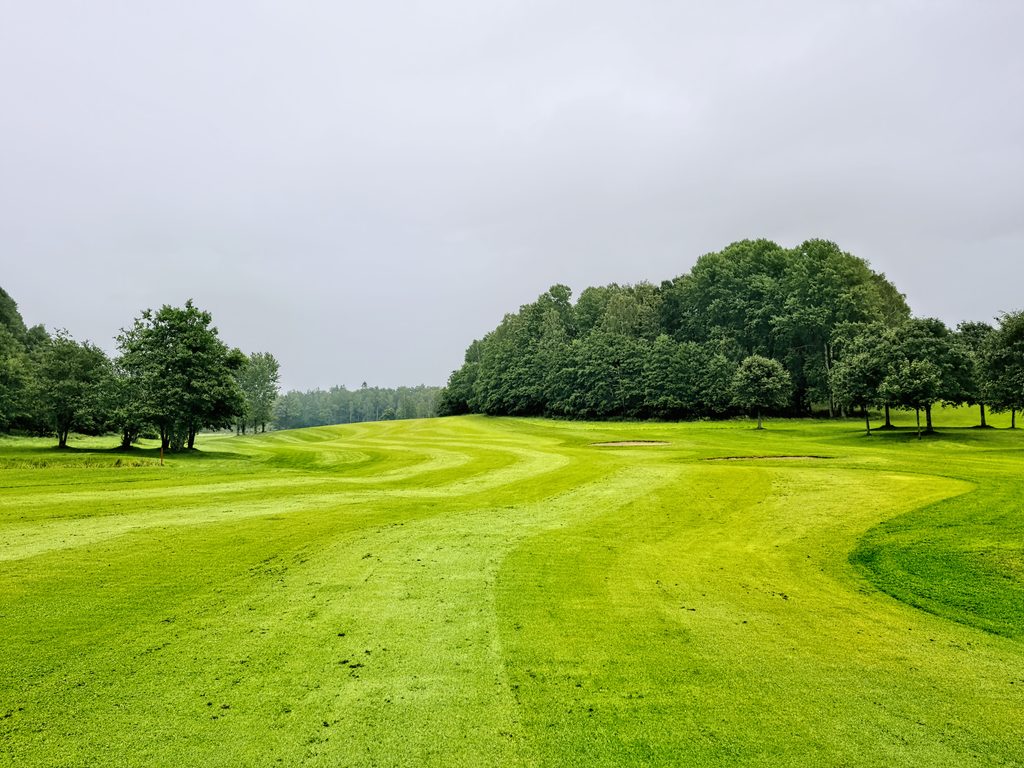
The fairway is the closely mown area that generally extends through the main playing corridor between the teeing area and the putting green. On many holes, it forms the most recognizable route through the center of the hole, although its exact shape and width depend on the course design.
Fairway grass is cut shorter than the surrounding rough and maintained to create a relatively even playing surface. Because the grass is shorter, a ball resting on the fairway will generally sit more cleanly against the turf than a ball surrounded by longer rough. This difference in mowing height is one of the easiest ways for a beginner to identify where the fairway ends and the rough begins.
Fairways are not always straight or uniform. They can narrow and widen at different points, curve to the left or right, climb uphill, run downhill, or move across sloping ground. A hole that changes direction significantly is commonly described as a dogleg, although that term describes the shape of the hole rather than a separate part of the course.
Other course features can also appear within or alongside the fairway. Fairway bunkers may border or extend into the closely mown area, while trees, slopes, streams, penalty areas, and changes in terrain can influence the overall shape of the hole. As a result, the fairway may look very different from one hole to the next.
The fairway also does not necessarily continue all the way from the teeing area to the putting green as one uninterrupted strip of short grass. On some holes there may be rough, bunkers, water, or other features between sections of closely maintained turf.
For a beginner learning golf course anatomy, think of the fairway as the main closely maintained playing corridor through the hole. It is an important visual feature for understanding the layout, but it should not be thought of as a required path that the golf ball must follow.
The Rough

The rough is grass outside the more closely mown playing areas of a golf hole, particularly alongside the fairway and around portions of the putting green. It creates a visible transition from the shorter, more uniformly maintained turf to areas where the grass is allowed to grow longer.
Because rough is cut higher than fairway grass, it changes how the golf ball rests on the ground. On a fairway, the shorter grass generally gives the ball a relatively clean, exposed lie. In rough, longer blades of grass can surround the ball, partially cover it, or allow it to settle below the top of the grass.
This resting position of the ball is called its lie. Two balls only a few feet apart in the rough can have very different lies: one might sit almost on top of the grass and remain clearly visible, while another can settle deeper between the blades. That variation is one reason rough is less uniform than fairway turf.
Not all rough is maintained at the same height. Many courses have light or intermediate rough immediately outside the fairway, where the grass is only moderately longer than the closely mown turf. Farther from the fairway, a course may have deeper rough, with taller or denser grass. Some courses also transition into native grasses or other vegetation beyond the regularly maintained rough.
The height, thickness, and type of grass can vary considerably between golf courses and with growing conditions, weather, and course maintenance. As a result, “rough” does not describe one universal grass length or condition.
For a beginner, the important relationship to understand is:
Longer or denser grass → more grass surrounding the ball → a less predictable lie → potentially more difficult contact.
This does not mean every ball in the rough is difficult to play. A ball sitting high in light rough can be relatively exposed, while one that settles into deeper grass may be much less accessible. At this stage, the goal is simply to recognize the rough, understand why it differs from the fairway, and notice how the longer grass can change the ball’s lie. How to adjust your technique when playing from rough is covered later in the course.
The Putting Green

The putting green, usually shortened to simply the green, is the specially prepared area containing the hole that the golfer is trying to complete. It is the finishing area of each golf hole and is one of the most carefully maintained surfaces on the course.
The grass on a putting green is cut extremely short and maintained to create a dense, relatively smooth surface over which a golf ball can roll. This makes the green noticeably different from the fairway, rough, and surrounding fringe. From a distance, you can often recognize it by its smooth appearance and the flagstick marking the location of the hole.
Putting greens vary considerably in size and shape. Some are relatively flat and open, while others contain slopes, rises, depressions, and changes in contour. The surface does not have to be perfectly level to be considered a putting green. These contours are part of the physical design of the green and can cause a rolling ball to change speed or direction. How golfers account for those slopes when putting is covered later in the course.
Two important features identify the destination of the hole:
- The cup, commonly referred to simply as the hole, is the opening in the ground into which the golfer is trying to play the ball. The cup itself is fitted into the ground below the putting surface.
- The flagstick is the movable pole positioned in the hole, normally with a flag attached near the top. Its height and visibility help golfers identify the location of the hole from farther away.
It is useful to distinguish the putting green from the cup. The green is the entire specially prepared putting surface; the cup is only the small opening located somewhere within that surface. Reaching the green therefore does not mean the hole has been completed—the cup remains the final destination.
The cup’s location is also not permanently fixed in one spot. Course staff can move the hole to different suitable locations on the putting green. Moving it helps distribute wear caused by golfers repeatedly walking and playing around the same small area and means the flagstick may appear in a different part of the green on another day.
The edge of the putting green generally transitions into slightly longer grass, commonly called the fringe or apron. This difference in mowing height helps distinguish the actual putting surface from the surrounding turf, even when both areas appear short and closely maintained.
For a beginner learning golf course anatomy, think of the green as the specially prepared finishing surface of the hole, while the cup is the specific destination within it and the flagstick makes that destination easier to locate.
Putting technique, reading slopes, and the detailed rules that apply specifically to the putting green are covered later in the course.
The Fringe or Apron

Immediately around many putting greens is a narrow band of closely mown grass commonly called the fringe or apron. It forms a transition between the putting green and the longer grass surrounding it.
The fringe is generally cut shorter than the surrounding rough but slightly longer than the putting green itself. Because the difference in grass height can be small, especially on a well-maintained course, a beginner may initially have difficulty seeing exactly where the putting green ends and the fringe begins.
One useful way to recognize the difference is by looking at the texture and mowing of the turf. The putting surface usually appears smoother, finer, and more uniformly cut. The fringe often forms a visible border around some or all of the green before the grass becomes progressively longer farther away.
The width and shape of the fringe are not identical on every golf course. It may form a relatively narrow collar around the green in some places and a wider closely mown area in others. The surrounding terrain can also slope, rise, or fall, so the transition is not necessarily a perfectly even ring.
A ball can therefore be extremely close to the putting green—sometimes only inches away—while still resting on the fringe. This is an important course-anatomy distinction because close to the green and on the putting green do not necessarily mean the same thing.
For a beginner, think of the progression in grass height this way:
Putting Green → Fringe/Apron → Longer Surrounding Grass
The green is the specially prepared putting surface containing the cup. The fringe is the closely mown transition immediately outside that surface, and the surrounding grass generally becomes longer as you move farther away.
At this stage, the important skill is simply being able to recognize the physical difference between the putting surface and the grass immediately around it. How to play different shots from around the green is covered later in the course.
Bunkers
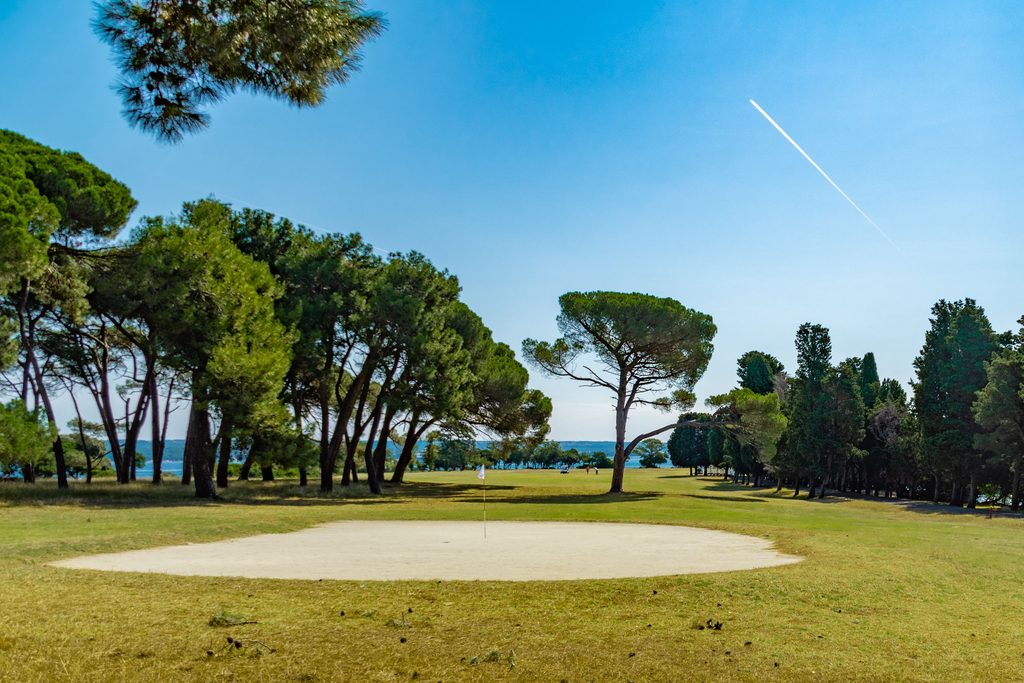
A bunker is a specially prepared area of sand on the golf course. Unlike rough or other naturally occurring areas, a bunker is deliberately constructed and maintained as a distinct course feature. Its shape, depth, size, and position can vary considerably from one golf course – or even one hole – to another.
Some bunkers are broad and relatively shallow, making the entire sand area easy to see. Others are smaller or deeper, with raised edges or steep faces that make them visually more prominent. The type and texture of the sand can also vary between courses.
For a beginner, the easiest way to recognize a bunker is as a clearly defined sand-filled area that contrasts with the surrounding grass. Bunkers are commonly positioned in two broad locations: along the fairway and around the putting green.
Fairway Bunkers
Fairway bunkers are located along or near the main playing corridor of a hole. Depending on the course design, they may sit beside the fairway, extend into its edge, or interrupt part of the closely mown playing area.
They can vary considerably in size and shape. Some are relatively small and positioned on one side of the fairway, while others are long, wide, or arranged as a group of separate bunkers. Their edges may be shallow and easy to see, or they may have higher faces that make the sand less visible from farther back on the hole.
The term fairway bunker describes the bunker’s general location rather than a completely different type of bunker. Its defining characteristic is that it is positioned away from the putting green and within or alongside the main fairway portion of the hole. This distinguishes it from a greenside bunker, which is located close to the putting green.
Greenside Bunkers
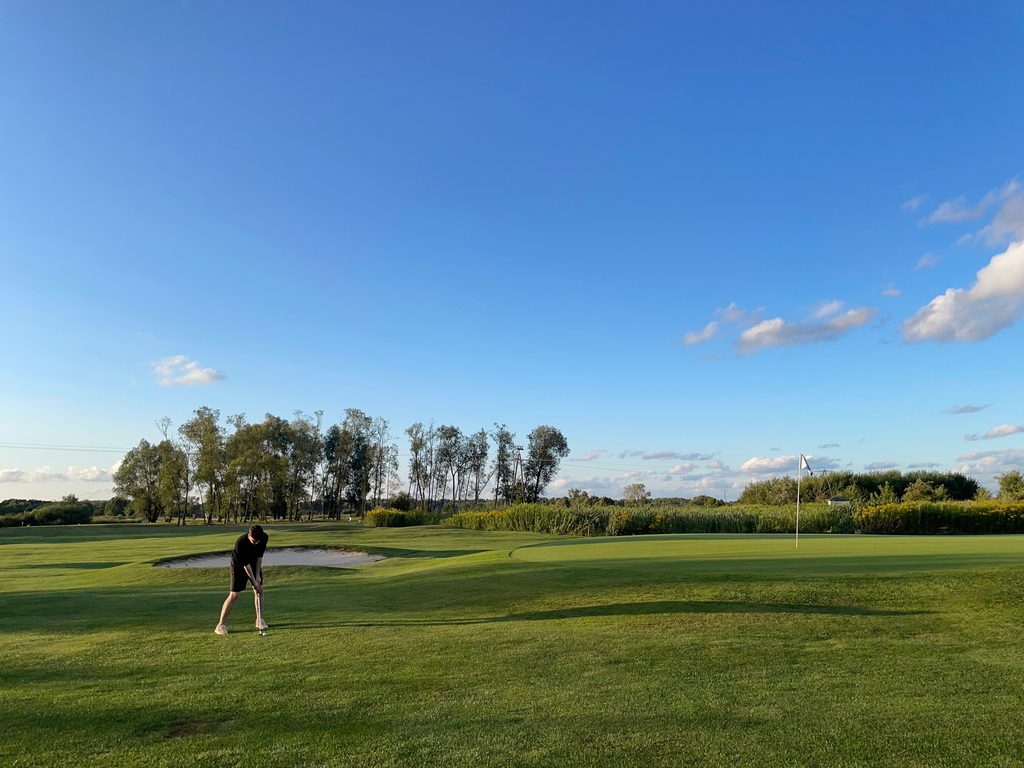
Greenside bunkers are positioned close to the putting green. They may sit in front of the green, along either side, behind it, or around several portions of the putting surface.
Greenside bunkers vary greatly in size, depth, shape, and sand conditions. Some are shallow and open, making the sand easy to see from a distance. Others are deeper, with steep faces or raised banks that can make part of the bunker difficult to see from elsewhere on the hole.
Their shapes also vary. Some are small and compact, while others are wider or curved to follow the contours of the putting green and surrounding terrain.
The main distinction is location: a fairway bunker is positioned within or alongside the fairway area, while a greenside bunker is located close to the putting green.
Penalty Areas
A penalty area is a specifically defined part of the golf course where special Rules of Golf procedures can apply.
Penalty areas are often associated with water features, such as ponds, lakes, streams, and ditches. However, a penalty area does not have to contain water. A course can designate other areas as penalty areas when appropriate.
They are identified by red or yellow stakes, lines, or other permitted markings. These markings establish the boundary of the penalty area, so the defined area may not always match exactly what a golfer assumes from simply looking at a pond, stream, or other feature.
The important distinction is that penalty area is a defined golf term, not simply another name for water.
Did you know?
Some of the world’s oldest golf courses developed naturally along coastal land, where sandy soil, rolling ground, dunes, and native grasses shaped the holes. This type of course became known as links golf, and it helps explain why golf courses can look so different from one another.
Out of Bounds
Out of bounds, commonly abbreviated OB, refers to ground outside the defined boundaries of the golf course. If an area is out of bounds, it is considered beyond the area in which the course is meant to be played.
Course boundaries may be identified by white stakes, boundary fences, walls, or other defined markings or features. These markers help golfers recognize where the course ends and out-of-bounds ground begins. The exact type of boundary can vary from one course to another.
Out of bounds is different from a penalty area. Penalty areas are specifically designated areas on the course and are commonly identified by red or yellow stakes or lines. Out of bounds, by contrast, refers to ground beyond the course boundary.
This distinction is useful when learning course anatomy: a pond or marked natural area may be a penalty area, while property beyond a white-staked boundary or boundary fence may be out of bounds.
Trees and Natural Features
Golf courses are built through landscapes rather than on standardized flat fields, so natural features are an important part of their character.
Depending on the property, you may encounter:
- Trees and wooded areas
- Hills and slopes
- Valleys and depressions
- Native grasses and vegetation
- Rock formations
- Uneven or rolling terrain
These features help explain why two holes of similar length can look completely different.
A fairway climbing uphill between trees presents a very different physical environment from an open fairway running downhill beside a pond—even before any discussion of how a golfer should play either hole.
Yardage Markers
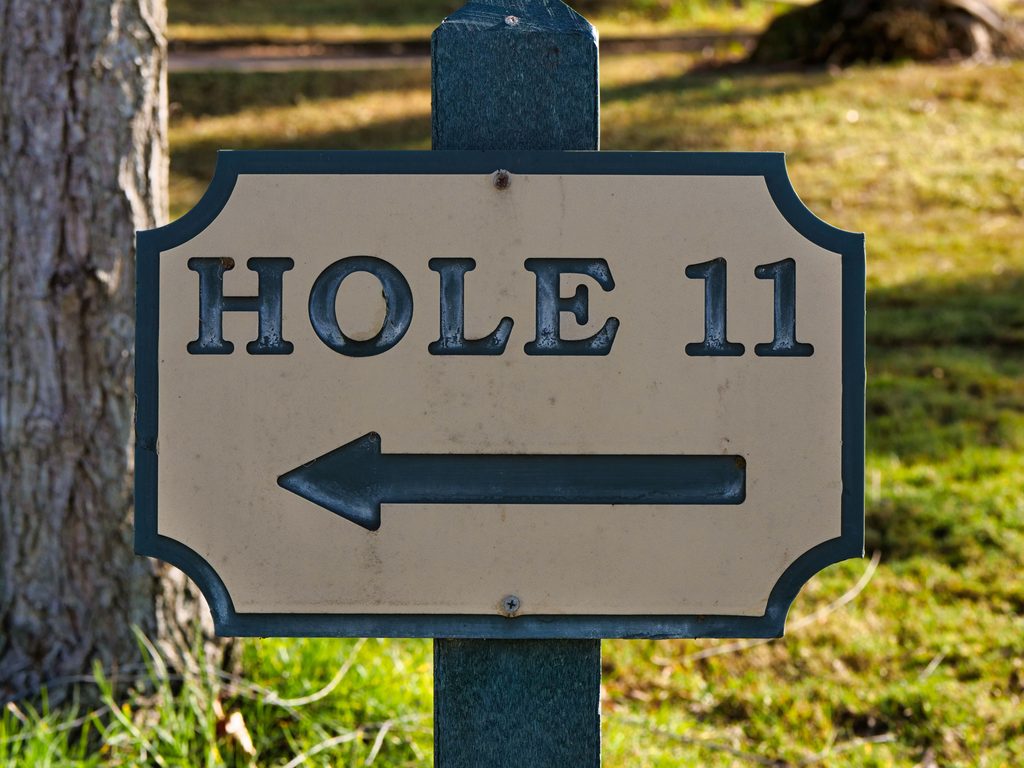
Golf courses commonly provide yardage markers or other distance information to help golfers understand distances on the hole.
Depending on the course, distance information may appear on sprinkler heads, posts, plaques, fairway markers, tee signs, cart displays, or other course features.
An important detail is that the reference point used for a displayed yardage can vary. A course might provide distances to a particular point on the green or use another defined reference. Beginners should therefore pay attention to the course’s signs or information rather than assuming every marker means exactly the same thing everywhere.
For now, the purpose is what matters: yardage information helps a golfer understand distance on the course.
Using that information to select a club or make strategic decisions is covered later.
Practice Areas at a Golf Facility
Many golf facilities provide dedicated practice areas where golfers can work on different parts of the game without playing a hole on the course.
A driving range is a large practice area for hitting golf shots, usually from designated hitting stations toward an open field with distance markers or targets.
A practice putting green is a specially maintained putting surface, often with several holes or targets. It allows multiple golfers to practice putting in one area.
A chipping area provides a green and surrounding turf designed for practicing short shots played from near the green.
A practice bunker is a sand bunker specifically provided for practicing shots from sand, often located beside a chipping or short-game area.
Practice facilities vary from course to course. Some golf facilities have all of these areas, while smaller facilities may provide only a putting green or driving range. These are separate practice environments, not additional holes that form part of the golf course’s normal playing sequence.
Other Areas Around a Golf Course

A golf facility includes more than the playing areas themselves.
The clubhouse is a central building that may contain check-in facilities, locker rooms, food and beverage services, event spaces, or other amenities depending on the property.
The pro shop is commonly where golfers check in and may also sell golf equipment, clothing, balls, gloves, and accessories.
Cart paths are designated routes intended primarily for golf carts. Their surfaces may be paved, gravel, or another material depending on the facility.
A starter area is typically located near the beginning of the course. At facilities that use a starter, this is where groups may be organized and directed to begin at the appropriate time.
The exact arrangement varies from facility to facility, but recognizing these areas makes arriving at an unfamiliar golf course much less confusing.
Visual Anatomy of a Typical Golf Hole
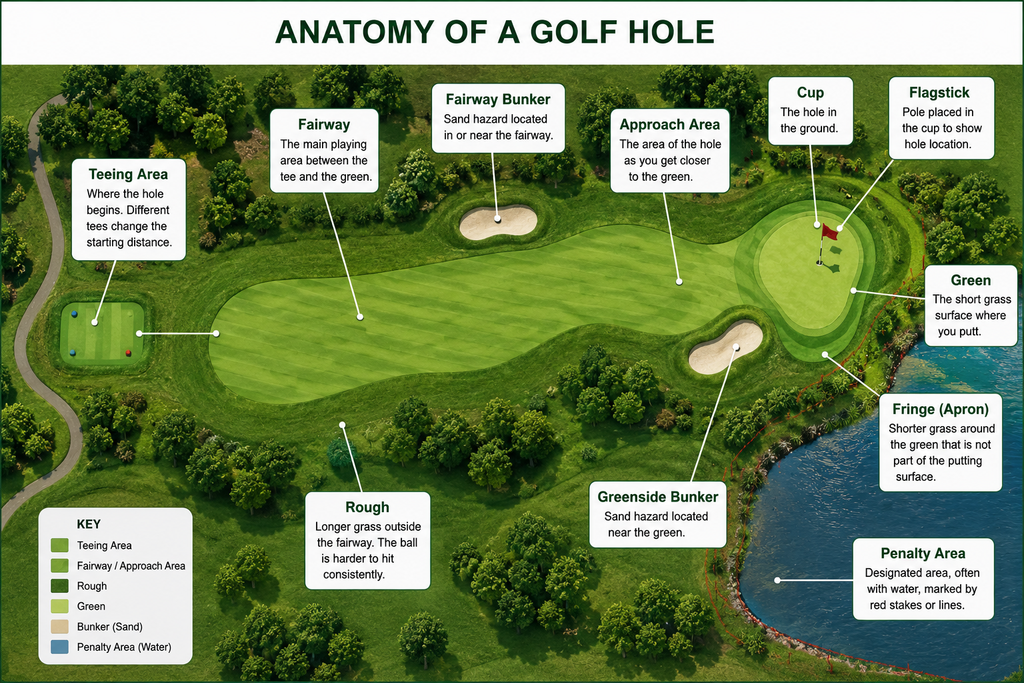
At its simplest, the physical progression of a typical golf hole can be pictured like this:
Teeing Area → Fairway → Approach Area → Green → Cup
The approach area in this simple illustration describes the portion of the hole as it nears the green; it should not be interpreted as a universal, separately defined strip of turf like a putting green or teeing area.
Around that basic path, the hole may contain rough, bunkers, trees, slopes, penalty areas, and other features. The exact arrangement is determined by the design and landscape of that particular hole.
Once you understand this basic anatomy, a golf course stops looking like one continuous stretch of grass. You can begin to recognize the distinct areas that make up each hole and the larger facility.
Complete your golf setup with the right accessories.

Golf Accessories
Home SHOP BY CATEGORY Drivers Fairway Woods Hybrids Irons Wedges Putters Golf Club Sets Accessories Essential Golf Accessories Accessories won’t fix your swing but they absolutely impact comfort, consistency, and course management. Below are essential add-ons organized by purpose so you…
Key Takeaways
- • A golf course is made up of individual holes, commonly arranged as 9 or 18 holes; on an 18-hole course, holes 1–9 are the front nine and 10–18 are the back nine.
- • The main physical progression of a typical hole runs from the teeing area, through the main playing area, to the putting green and cup.
- • Fairway, rough, fringe, bunkers, penalty areas, and out-of-bounds boundaries are distinct features with different physical characteristics and purposes.
- • Yardage markers and practice facilities provide useful information and dedicated spaces beyond the basic anatomy of a hole.
- • Golf courses vary considerably, but learning these common features gives you a framework for understanding almost any course you visit.
Now that you can recognize the major parts of a golf course, the next lesson introduces basic golf terms every beginner should know, building the vocabulary you will hear in lessons and conversations throughout the game.
Previous: How Golf Scoring Works >>>
Next: Basic Golf Terms Every Beginner Should Know >>>